6 min read / 16 May 2023 / Laura Garvin Gomez
How to Melt Candle Wax
Melting your wax correctly is a key step in creating beautiful, perfectly-crafted candles. Here's how to do it.
Share this post

When making candles for the first time, there can be a lot of steps to remember.
From discovering optimal scent temperatures to ensuring your wicks are standing up straight, first-time candle making is fun, but is certainly not without its challenges.
The biggest and most important aspect of the entire process is your candle wax. Learning how to melt candle wax at home is a hurdle that many candle makers initially struggle with, and it can be an understandable fear to tackle.
Fortunately, effectively melting candle wax for use in your products is a lot simpler than it seems. We'll be detailing everything you need to know about how to melt candle wax and a few different methods you can try out at home.
At what temperature does candle wax melt?
The temperature at which your candle wax will melt largely depends on the kind of wax you're using.
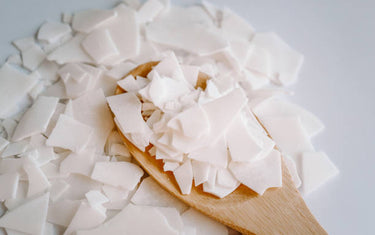
The most popular wax choices for candle making include soy wax, paraffin wax, beeswax, and gel wax. Each of these will melt at different temperatures and at different rates, so it's important to become familiar with your particular wax type before you get started.
Here are the most popular wax types and their differing melting points:
- Soy wax: 49-82°C
- Paraffin wax: 46-68°C
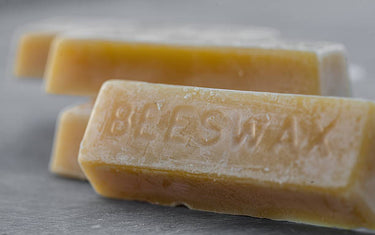
- Beeswax: 62-65°C
- Gel wax: 82°C
Unless your wax manufacturer states otherwise, it is never recommended to go above 80°C when melting candle wax at home.

How to melt wax for candles
There are two common methods for effectively melting candle wax - the double boiler method and the microwave method.
Both can be done from the comfort of your own home, and both (when done correctly) can result in an even, perfectly-melted base for your candles. Here's how to use them.
The double boiler method
The double boiler method is described by some candle makers as the best way to melt candle wax, primarily because it's easy to keep an eye on your wax as it heats up. Follow the steps below to perfectly melt your wax using this method.
You will need:
- A large pan
- A smaller (glass) bowl
- Soy wax
- A thermometer
Method:
- Fill your large pan around halfway with water and heat it gently on your stove.
- Place your soy wax into a small bowl and carefully set it inside the large pan, on top of the hot water. Note: Don't let any hot water get into your wax, as this could ruin the process!
- Heat the wax over medium heat until it has completely melted. Don't let your wax exceed 80°C. If needed, you can use a thermometer to monitor the temperature of your wax as it heats up.
- If you're adding colour to your candles, wait until your wax reaches 70°C. Sprinkle this in as desired.
- Remove your wax from the heat and let it cool until it reaches 65°C. At this stage, you're ready to add your chosen essential oils or fragrance oils.
- Gently stir your oils into the wax for about a minute or so.
- Your wax is now ready to pour into your chosen candle container.
When using this method, it's important to never leave your double boiler unattended at any time. This will prevent potential burns as well as the accidental overheating of the wax.
Any pan that you use for heating wax should not be used for food preparation thereafter.
The microwave method
Can you melt candle wax in the microwave? Well, it turns out you can actually.
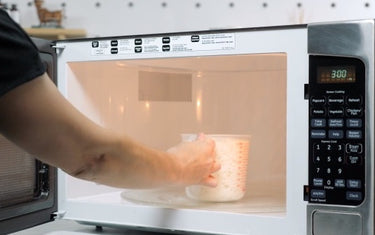
The microwave method is a popular choice if you want your candles heated quickly and without the need for too much washing up, but you do have to be careful not to overheat your wax while melting it in this way.
Here's how to do it:
- Place your wax in a microwaveable container. Ceramic or glass containers are usually fine for this, but it's worth checking for "microwave safe" or "heatproof" labels on the packaging, just in case.
- Pop your container with your wax into the microwave. Heat for one minute at a time until the temperature reaches 80°C. Do not let your wax exceed 80°C.
- Place the container with your melted wax onto a safe, even, and heatproof surface.
- When your wax reaches the 70°C mark, you're free to add your desired colours and fragrance/essential oils to the mix.
- Stir your ingredients together to ensure they're blended with the wax.
- Your wax is now ready to be poured into your candle container.
Keep in mind that microwaves work quickly and can be very powerful when heating, so don't leave your wax unattended at any time throughout the process!
It's also important to clean your microwave thoroughly after using it to melt the wax.
How to melt wax from old candles
If you're not keen on making your own candles from scratch, but have a few old candles lying around that could use a new lease of life, you can also try melting these down to create new products.
The first way is to simply adopt the double boiler method mentioned above, but using an existing candle container instead of a glass or ceramic bowl.
This method is safest using a glass candle jar - don't try to double boil old candles if they have any remaining labels or if the container is made from another, more tricky material.
While the microwave method can technically be used for old candles, it's not recommended as the container may not be microwave safe. Instead, you can scoop up any remaining wax from your container and place it in a microwaveable bowl.

How do I fix a candle that has melted incorrectly?
Even if you follow all the steps correctly, mistakes can happen now and then when making your candles - and that's okay!
First-time candle makers are always more likely to run into problems, but thankfully there are a few easy fixes that you can adopt if your candle wax starts to look a little worse for wear.
1. Use a heat gun or hair dryer
If your candle begins tunnelling or your wicks have become buried in your wax, using this method is ideal for melting that top layer and "resetting" your candles.
A heat gun is generally recommended as it allows for the greatest control over temperature and airflow, but a standard hair dryer should work just as well. Here's how to do it:
- Wipe away any dust or debris from the top of your wax with a clean, dry paper towel.
- Turn on the heat gun/hair dryer and set it to the highest heat.
- Hold it around 6 inches or so from the surface of the wax.
- Using a wick dipper or toothpick, gently move any un-melted wax stuck onto the sides of your container.
- Continue heating the wax until it has liquified across the top layer of your candle.
2. Use aluminium foil
Not keen on using a heat gun or hair dryer to fix your wax woes? Aluminium foil offers up a (rather surprising) solution too.
This method uses foil to trap heat inside the candle, speeding up the rate at which the top layer is melted. Here's how to incorporate it:
- Wipe away any dust or debris from the top of your wax with a clean, dry paper towel.
- Cut a piece of aluminium foil that is just big enough to cover the top of your troublesome candle.
- Cut out a small, one-inch hole at the centre of your aluminium foil.
- Light the wick of your candle and wrap the foil over the top. The hole in the foil should not be covered and should instead go directly over the flame.
- Allow the candle to burn for a few hours until the top layer of wax has melted.
Are there any other tips for first-time candle makers?
As a beginner in the world of candle making, there can be many unanswered questions that flurry around your head while you're trying to decide the best choices for you.
Our beginner's guide to candle making can help cover the basics, but you can also refer to our candle making tips for beginners for extra guidance on how to tackle some frequently asked questions.
As for scents, we have a whole range of essential oils and fragrance oils for your consideration right here - so no need to panic!

Learning how to properly melt candle wax can come as second nature to some, or a trial and error process for others.
Regardless of the circumstance, adopting the right methods for you will allow candle making to become a breeze in no time. Remember to always be extra cautious when using heat to make your candles, and never leave any equipment unsupervised.
If you're a candle maker looking to start up your own business, you can also check out our wholesale sign-up form for the chance to access all our trade prices as well as custom documentation for your candles.


