5 min read / 1 June 2023 / Laura Garvin Gomez
How to Make Candles with Essential Oils
Candle making is a fun and easy way to get creative with your oils - no expertise needed.
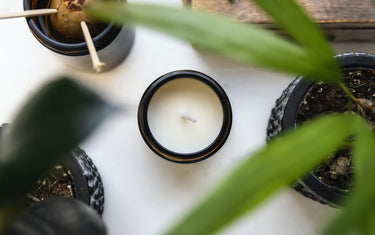
If you’re looking to get creative with your oils, then candle-making is the perfect place to start.
Whether you’re a seasoned crafter or a complete beginner, candles are an ideal homemade gift – they’re simple to make, they’re budget friendly, and there’s no end to what you might create.
Plus, if you're considering turning your candle-making hobby into a business, don't forget to explore Nikura's wholesale program for great deals on wholesale essential oils and other candle-making supplies. Sign up now to access wholesale discounts and kickstart your candle-selling venture!
Unlike soap making, which can take a few attempts to master, candle making is a very accessible craft, and one that you don’t need a ton of free time to get stuck into.
This basic guide to candle making will serve as the basis for all your future creations. Simply swap in your chosen oils and you’re good to go!

How to make candles using essential oilsYou will need:
Method:
|
How do I choose and measure my oils?
The quantities of the oils you choose will vary due to a number of factors: the potency of the oil, the size of the container, the number of oils you use, and personal preference.
As a general rule, we would recommend using 30-35 drops of oil for every 160g of soy wax flakes.
However, if you are using an oil with a particularly strong or gentle scent, you may want to add more or less.
Use your best judgement and adjust next time if needed. If you are using a combination of oils, then you may want to add 15 drops of one and 16 of the other – don’t double the total amount of oil!
You can use either essential oils or fragrance oils in your candles. Some people prefer the stronger scents of fragrance oils, or they may want to use a scent that can’t be found in natural products.
Others value the natural scents and benefits of essential oils. We would recommend experimenting with both in order to find your favourites.
What are some good essential oils for candles?
Some of our favourite essential oils for candles are:
- Lavender oil: perfect for lighting whilst winding down for sleep
- Bergamot oil: great for waking up with in the morning
- Eucalyptus oil: helps to decongest when you're feeling under the weather
- Clary Sage oil: a luxurious floral scent for those self care days
- Cinnamon oil: a perfect festive scent for when your wrapping presents or setting a christmassy mood

What are some essential oil candle making tips?
- Once you use up a candle, re-use the container and fill it with a new one! It’s good for the planet – and your budget.
- You may also want to experiment with adding colour to your candles. You can do this at step 5 and add the colour to the wax along with your oils. Make sure you research your colour beforehand to ensure that it’s candle friendly.
- Keep your wick standing straight all day by laying two skewers or chopsticks across the surface of the candle and placing the wick between them. Just be sure not to drop them in the wax!

Throughout the calendar year, making candles with essential oils can provide all kinds of seasonal fun. Now that you know the basics, why not create your own candle recipe for the next holiday that comes around?
Before you get started on your new candle-making hobby or even your candle-selling business venture, don't forget to explore Nikura's wholesale program for amazing deals on essential oils, wax flakes and other candle-making supplies.
Our wholesale program offers competitive prices and a wide selection of high-quality oils and wax flakes, perfect for crafting your signature candles.
Joining is free, with no minimum order requirement, making it easier than ever to stock up on your favourite oils and get started on your candle-making adventure. Unlock the door to endless creativity and savings with Nikura's wholesale program today!


