5 min read / 9 April 2025 / yasmin sharp
How to Colour Candles with Natural Dyes
Learn how to create candles using natural dyes from herbs, spices, flowers, and fruits for beautiful, sustainable home decor.
Share this post
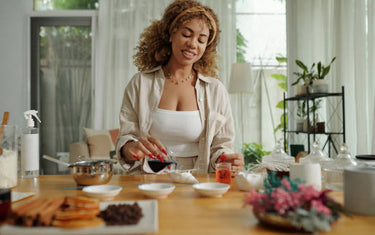
If you’re eco-conscious and want to make sure that your candles are as organic and sustainable as possible, then you also have the option of tinting your candle wax with natural dyes.
Whether you extract the dye from flowers, herbs, spices or berries, you can infuse the scent and colour of natural ingredients to create eye-catching and environmentally friendly candles.
We look at some of the sources you can use for your recipes, along with step-by-step instructions on how to colour your candles with natural dyes.

What are natural candle dyes?
Natural candle dyes are pigments that have been extracted from minerals or plants, ensuring the wax is not colourised with man-made chemicals.
Not only can they give your candles more of a handcrafted touch, but they also ensure your creations are non-toxic and eco-friendly.
Some popular natural candle dyes include:
- Herbs and flowers such as rose petals, lavender or chamomile.
- Spices like cinnamon, turmeric and paprika.
- Clay and minerals such as kaolin clay, spirulina powder or French green clay.
- Berries and fruits including raspberries, blueberries and pomegranates.
Cocoa powder and activated charcoal are also commonly used for brown and black colours, respectively.
What are the best types of wax for natural colours?
Natural waxes are generally the best type of waxes to use for natural dyes, so you have the option to use:
Soy wax
This is a softer more pliable wax that has a low melting point, which supports better absorption of the dye.
Palm wax
Like soy wax, this is also quite soft and easy to mould and shape. A good option if you want to make pillar candles.
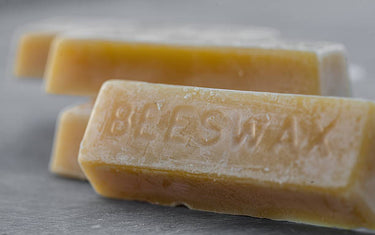
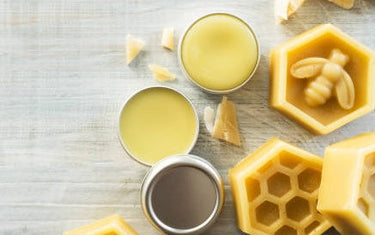
Beeswax
Opting for pure beeswax means you can change the tint and combine the scent of the dye with the slightly sweet aroma of the wax.

Instructions for candle colouring with natural dyes
Once you have chosen your candle for colouring, gather the following items:
- Slow cooker
- Jelly jars
- Soy wax
- Wicks
- Coffee filters
- Twist ties or string
- Natural herbs/spices of your choice
1. Place the jars in the slow cooker
Take your jelly jars and place them in a water bath inside the slow cooker, making sure that each jar is filled with about 175ml of soy wax.
2. Make the herb packets
Choose your herb of choice and put it inside a coffee filter – separating enough for every jar you are using. Once done, use a twist tie to tie each one into a bundle.
3. Steep the filters
You can now steep the herb packets by placing them into the jars, with the slow cooker set to a low heat. Leave them to soak for 24 hours, and the wax should ideally stay at around 130-140 degrees Fahrenheit. Keep a close eye over the next 24 hours, making sure to stir every 4-6 hours as this will ensure that the wax is fully infused. If you want to infuse deeper colours, leave the wax to infuse for a further 24 hours.
4. Add the wicks and leave to cool
Once the infusion process has finished you can remove the packets from the jars. You have the option to add the wicks to the jars or pour the melted wax into any other jars or moulds that have their wicks in place. Leave the wax to cool and allow the candles to cure for at least a week.
Other ways to dye your candles with natural colours
Of course, not everyone will own a slow cooker or have coffee filters lying around. Here are a few other ways to go about candle colouring.
- Make without a jar: Melt the wax in a pot on a low heat before pouring it into your container of choice. Keep a close eye on the temperature as it will need to be kept at a low temperature for the steeping process.
- Infuse the colour without coffee filters: Using a small muslin bag or a cheesecloth can prove just as effective as a coffee filter. There may be more colour bleeding with finer powders like spirulina or alkanet, but this shouldn’t be an issue with most natural dyes. Before you start to make the candle, check if you need to strain out any remaining sediment that has been left behind.
- Use a different cooking device: Instant Pots or Presto Pots are good alternatives you can use if you do not own a slow cooker, as you can set a low temperature that will remain stable for long periods.
Can I colour a candle with tea bags?
If you want to colour paraffin wax, then you may find that it can be a little resistant to absorbing certain types of dye.
You can use any type of tea bag to dye your candles, and while you will see a noticeable colour change, don’t expect bold and bright colours once you have finished.
To see how candles and tea bags work together, follow the steps below:
- Melt the paraffin wax in a double boiler at a temperature no higher than 203°F.
- Dip at least two (or more if you want a darker shade) tea bags in the paraffin and let them rest for 20-30 minutes. Moving the tea bags up and down occasionally will help them to release more colour.
- You should start to see the paraffin wax turn to natural, yellow/green shade.
- Once you are happy with the colour, remove the pot from the heat and use a thermometer to track the temperature, letting it fall to around 167°F.
- Prepare the mould and ensure the wick is centred ahead of pouring in the wax. Once finished, you can leave it to cool and harden for at least 24 hours. As the wax cools, the colour should become lighter, as dyes tend to look this when combined with paraffin.
Many people also ask “How do I make scented candles?” Follow the steps above making sure to add your essential or fragrance oils of choice after step four and mix these into the newly colourised wax.

Final thoughts
Nature is a wonderful provider and there are a host of plants, flowers, fruits, minerals and spices you can use to organically dye your candles. The colouring process is slower compared to synthetic dyes, so a little more patience is needed, but you can still get some fantastic results. Using natural colours helps to enhance the hands-on aspect of candle making, ensuring the finished product feels even more personal and special when it’s time to use.


