7 min read / 22 January 2025 / yasmin sharp
How to Make Homemade Beeswax Lip Balm
Learn how to make natural beeswax lip balm at home with simple ingredients for moisturised, protected lips year-round.
Share this post
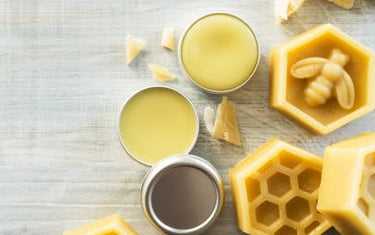
Experiencing dry, cracked lips is not just a problem exclusive to the autumn or winter, as many people have to contend with it during the warmer months.
Using beeswax lip balm to nourish and condition your lips can give you more protection all year round by combining a simple selection of natural, eco-friendly ingredients.
We look at what goes into beeswax recipes, lip balm benefits and some helpful tips you can use to ensure you get the best protection possible.

What are the benefits of using beeswax for lip balm?
Some of the main beeswax benefits you can enjoy with a lip balm include:
It can protect lips and lock-in moisture
When your lips are overexposed to wind, cold temperatures or UV rays, they start to lose moisture and become dry and chapped.
The natural lubrication and softening properties of beeswax make it a natural moisturiser for lips, helping to reduce trans-epidermal water loss from skin, as researchers noted in this 2016 minireview. [1]
Beeswax also works as an occlusive, which means it creates a barrier on top of the skin to prevent water loss, which helps to keep your lips moisturised for longer.
Beeswax helps to heal lips and combat infections
The anti-inflammatory and anti-bacterial properties found in beeswax are ideal for lip balm, helping to prevent and heal infections on and around your lips.
Beeswax also contains vitamin A, which studies have found plays a key role in the healing of wounds. [2]
Making your own beeswax lip balm means you skin can benefit from its antiseptic abilities which comes from the presence of squalene, 10-hydroxy-trans-2-decenoic acid and flavonoids (chrysin), which can all help to protect skin against pathogenic microorganisms. [3]
Your lips can benefit from the anti-ageing effects of beeswax
Your lips can start to look dry and under-moisturised if overexposed to sunlight and warm conditions.
Researchers discovered that the presence of vitamin A in beeswax can help to reduce wrinkles while also protecting the skin against UV radiation, which is one of the main causes of ageing.
The study also found that skin cell turnover can be stimulated by vitamin E, which helps to keep skin looking fresh and rejuvenated.
Allows you to enjoy chemical-free protection
Most commercial lip balms contain a variety of artificial ingredients and chemicals that while regulated and deemed safe to use, may not be suitable for everyone’s skin.
Some may contain parabens (any ingredient that ends with -paraben), which have been linked to breast cancer. [4]
Petroleum is another common ingredient, while a consumer guide released by U.S. PIRG Education Fund (an American and Canadian-focussed consumer rights organisation) found that lip products manufactured by some of the world’s biggest brands contain potentially toxic and harmful substances. [5]

How to make lip balm at homeWe’ve put together a simple recipe for lip balm made with beeswax that you can whip up in no time at all. Ingredients
Method
|

Tips for making beeswax lip balm
Here are a handful of tips and tricks you can use to help you get the most out of your beeswax recipe:
1. Bulk buying can help lower costs
It’s a good idea to buy your ingredients in bulk, whether you are making the lip balm for yourself or if you are planning to sell it as part of your business.
The added benefit is that essential oils and beeswax can be used in lots of different ways, with their natural properties offering properties that can support your all-round wellbeing.
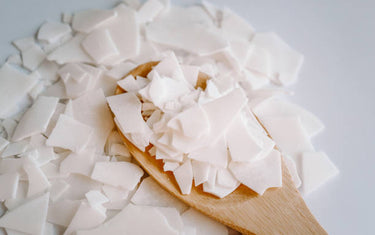
2. Look for pure beeswax
Ensure that you are buying beeswax that is as pure as possible, as some products can contain pesticides and contaminants.
Impure beeswax can affect the quality of the lip balm as it will feel different and won’t spread as easily on your skin.
3. The recipe order is important
Be sure to follow the recipe steps in order as it will make a difference to the quality of your finished balm.
For example, it’s important to allow time for the mixture to cool to the right temperature before adding your essential oils.
If you add them when the mixture is too hot, then it could evaporate as they can be quite temperamental.
4. Invest in a good thermometer
This relates to the point above as it can help you have more accuracy to make an even better lip balm.
Investing in a good thermometer ensures you can monitor the temperature changes and gauge exactly the right time to add the next stage of ingredients.
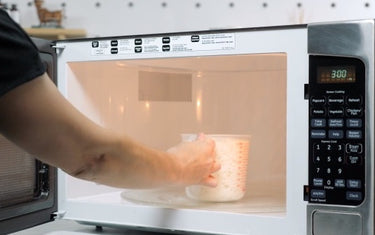
5. Avoid using the microwave
If you find a recipe elsewhere that recommends using a microwave, it is advisable to make the recipe on the hob.
Not only is it messier to use the microwave, but it can also create a health and safety risk.
Avoid covering the container as you heat the ingredients because if condensation forms inside the lid this could drip into your mixture and dilute it.
6. Feel free to experiment
You can change the ingredients in the recipe by swapping the essential oils or carrier oils, which can give you a different scent and finish.
Even if they do not come out as you intended, as long as the mixture contains beeswax, you may be able to use them for something else, such as a skin lotion or salve.

Does beeswax lip balm expire?
Provided you have stored the balm in a cool, dry space in your home and kept it in an airtight container, you should expect it to last for up to a year.
If you start to notice any bad smells or visual signs that the balm is not in its usual good condition, you should dispose of it and make a new batch.
What happens if the lip balm feels grainy?
If you start using the beeswax lip balm and notice a ‘grainy’ texture on your lips, this is likely due to the presence of shea butter in the recipe. This happens because shea butter tends to crystallise when it has melted and cooled slowly.
It doesn’t mean the lip balm is unsafe or in bad condition, but if you want to avoid the texture developing, heat the shea butter to 80C in a double boiler.
Let it warm at this temperature for 20 minutes before adding it to your recipe. Placing the finished lip balm in the fridge once it is ready can also help to avoid crystallisation.
What can I do if my lip balm is too soft or hard?
When weighing out the beeswax for your lip balm recipe, it’s important to be as accurate as possible, as it can affect the overall quality. For example, if you add too much, it can harden the balm, whereas not adding enough can make it feel too soft.
If you notice either of these issues once you start using the balm, you can fix it by melting down the balm and adding more coconut oil if it is too hard. Alternatively, add more beeswax if the balm is too soft.

Final thoughts
From helping to seal in moisture and combat inflammation to reducing the signs of ageing and offering chemical-free protection, using a beeswax lip balm has a lot to offer your skin.
It will provide a natural barrier against windy, cold or hot weather conditions and keep your lips looking plump, smooth and glossy.
And if you are new to the delights of beeswax, take a look at our selection of beeswax articles that will tell you more about how to use it in creams, lotions, salves and more.
[1] Filippo Fratini et al. (2016) Beeswax: A minireview of its antimicrobial activity and its application in medicine https://www.sciencedirect.com/science/article/pii/S1995764516301407
[2] Giedre Kasparaviciene et al. (2016) Evaluation of Beeswax Influence on Physical Properties of Lipstick Using Instrumental and Sensory Methods https://onlinelibrary.wiley.com/doi/10.1155/2016/3816460
[3] Anna Kurek-Górecka et al. (2020) Bee Products in Dermatology and Skin Care https://pmc.ncbi.nlm.nih.gov/articles/PMC7036894/
[4] Breast Cancer UK - Parabens and breast cancer risk https://www.breastcanceruk.org.uk/reduce-your-risk/chemicals-and-our-environment/parabens-and-breast-cancer/
[5] U.S. PIRG Education Fund https://pirg.org/edfund/resources/kiss-off-a-consumers-guide-to-saying-no-to-toxic-lip-products/


