9 min read / 18 October 2021 / Laura Garvin Gomez
How to Make Soap: A Beginner's Guide
Master the art of soapmaking with our easy-to-follow beginner's guide.
Discover your new favourite hobby with this comprehensive, easy-to-follow guide to the world of soap making.
When it comes to beneficial essential oils for skin, there’s a long list to choose from and one of the best ways to experience the benefits of these oils is by using them to naturally fragrance soap and enhance its cleaning power.
However, these natural products are often very potent, and need to be used with care and precision.

How to Make SoapIn this guide to soap making for beginners we are going to look at the full set-up and method for making cold process soap with essential oils, as well as common pitfalls and how to avoid them. Tools:
Once you have assembled your equipment, you’ll need to practice using it with some simple recipes. The recipe below makes eight bars of soap, but you can halve or even quarter this for small batch practice.
Adding essential oils: Depending on what oil you are using, your essential oils should constitute between 1-3% of the overall recipe. For example:
It may take a few goes to get the balance exactly right, and you may find that you need even less than what it is outlined here. This is matter of both the oil’s behaviour and your personal taste. Method:
|

Different Methods of Making Soap
There are a range of different methods for making soap, let’s take a quick look at some of the most popular ways.
Melt and Pour Soap Making Method
The 'melt and pour' soap making process is a simple and creative way to make soap at home without handling lye, which is used in more traditional soap-making methods.
This is one of the most popular soap making methods at the moment as it is much safer for young children to be involved with.
Here's a basic outline of the process:
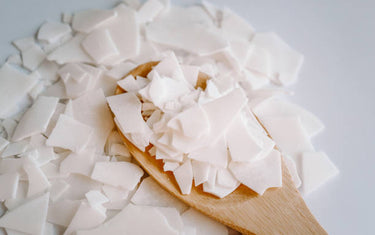
- Purchase a Melt and Pour Soap Base: These are pre-made soap bases that you can buy from craft stores or online. They come in a variety of types, such as glycerin, shea butter, goat's milk, and more.
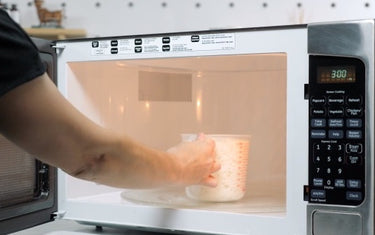
- Melt the Soap Base: Cut the soap base into chunks and place them in a double boiler, or microwave them in a microwave-safe bowl. Heat until the soap base is completely melted.
- Add Extras: Once melted, you can add in your chosen extras. This could be essential oils for scent, colouring, exfoliants like oatmeal or poppy seeds, or moisturising agents like shea butter or almond oil.
- Pour into Mould: Pour the melted soap mixture into a soap mould. Silicone moulds work best for easy removal.
- Let it Cool: Allow the soap to cool and harden. This can take a few hours overnight, depending on the size of the soap.
- Unmold and Use: Once the soap is fully hardened, it can be removed from the mould and is ready to use.
This process is safe and simple, making it a great choice for beginners or for crafting with kids.
Pros:
- Doesn’t involve any harmful chemicals
- Safe for kids to help (with supervision)
Cons:
- Requires a ‘melt and pour’ soap base
‘Cold Process’ Soap Making Method
The 'cold process' soap making method is a traditional technique that involves creating soap from scratch using oils, lye, and water and is very similar to the demo method we showed earlier.
This method allows for complete customisation of ingredients.
Here's a basic outline of the process:
- Prepare the Lye-Water Solution: Lye (sodium hydroxide) is mixed with water. This mixture heats up quickly and needs to cool down before use.
- Prepare the Oils: While the lye-water solution is cooling, oils (like olive oil, coconut oil, and palm oil) are combined and heated until they reach the right temperature.
- Mix Lye-Water and Oils: The lye-water is slowly added to the oils, and the mixture is stirred until it reaches 'trace'. 'Trace' is the point when the soap has thickened enough that a drizzle of soap stays on the surface for a moment before sinking back in.
- Add Extras and Pour: At this stage, additives such as colour, fragrance, and exfoliants can be mixed in. The soap mixture is then poured into a mould.
- Insulate and Set: The mould is covered and insulated to keep it warm, allowing the soap to go through a process called 'saponification' where the lye reacts with the oils to form soap.
- Cut and Cure: After 24-48 hours, the soap can be removed from the mould and cut into bars. The bars are then left to cure for 4-6 weeks to allow the excess water to evaporate.
It’s important to note that Lye can cause burns, so this is not the method to go for if you’re making soap with small children present!
Pros:
- Is a more ‘hands-on’ experience
- Can be more customisable
- Is the traditional method
Cons:
- Lye can cause severe burns
- Takes longer

What are some soap making challenges?
Switching to hot process halfway can sometimes be a way of saving soap if things start to go wrong. Here are some of the common problems soapers can experience.
- Acceleration: Acceleration occurs when the soap mixture thickens too quickly and starts to stick to the bowl. If this happens, lay down the stick blender and start whisking instead. Acceleration doesn’t necessarily mean that batch is ruined, but the thicker mixture may make it more difficult to create intricate designs, so be prepared to be flexible. Tapping the pot on the counter can help to get rid of bubbles in a whisked mixture.
- Seizing: If acceleration happens too rapidly then the mixture may seize, which causes it to get very thick and become very hard to work with. Some fragrance oils have been reported to cause this, and it has also found to have a higher risk of occurring with floral and spicy oils. Try pouring the soap into a pan three times bigger than your batch. The mixture will expand. Stir it over a medium heat until it starts to liquify. If needed, turn down the heat to avoid the mixture splattering, and then raise it again once it is back under control.
- Overheating: Certain fragrances can cause the mixture to heat up, which in turn can cause the soap to bubble out of the mould. If your mixture is getting too hot, you should be prepared to work quickly in order to save it. One possible way to save the mixture is by forcing gel phase – more on this later. It may also help to put it in the freezer for 24 hours before resuming the process.
- Ricing: When an ingredient in the fragrance binds with some of the harder oil components in the recipe, ricing can occur. This process is characterised by hard, rice-shaped bumps appearing in the oil. Usually you can blend the ricing back in using a stick blender. However, this can make the mixture quite thick, so prepare to rethink your design.
- Separation: Separation occurs when a fragrance prevents emulsification and the oil pools on top of the mixture. This can occasionally be fixed by stick blending, but caution should be used here as this can cause the mixture to seize. This is where it might be useful to switch to hot process.
- Discolouration: Discolouration of soap is commonly associated with vanilla pods but can also be caused by other ingredients. It usually involves the soap turning brown. Titanium dioxide pigment can help to lighten this discolouration.
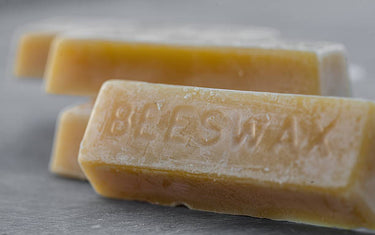
- Soda ash: Soda ash forms when lye reacts with carbon dioxide in the air and leaves a layer of powdery whiteness on the soap. This reaction doesn’t affect the quality of the soap, but it can affect the look and structural integrity of bars, making them crumbly. Adding in 0.5% melted beeswax can help, as can bringing the mixture to the gel phase.
- Gel phase: Now and then you may notice your soap beginning to appear gelatinous in the mould. This means that it’s going through gel phase. This process doesn’t affect the quality of the bars, but it does affect their appearance, and some people prefer the way in which the gel phase makes colours pop. It’s also useful if you’re in a hurry (although if you want to cure your soap you should still take 28 days to do that). Try covering your mould with a chopping board and draping a blanket over it to trap the heat in, or placing the mould on a heating pad. Check it after half an hour to make sure it isn’t overheating.

Creating soap with essential oils is a fantastic way to not only get quality use out of them, but also to learn more about how they work.
Think of this template as your blank canvas and apply it to your favourite blend recipe – or better yet, experiment with brand new combinations.
It’s important to remember when making soap, however, that different oils may behave in different ways during the soap-making process, and it may take some trial and error to get the results you want. We recommend practicing in small batches with cheaper ingredients. Soap-making is a great hobby, and there’s no limit to the colours, scents and designs that you can play around with.


