4 min read / 4 June 2024 / yasmin sharp
How To Make Layered Wax Melts
Learn how to create stunning layered wax melts , perfect for adding vibrant colors and delightful scents to your home.
Share this post
Making wax melts is fun, offering an easy way to bring a dash of colour and a variety of exciting scents into your home.
If you have been making wax melts for a while, then you may want to take on a bigger challenge and learn how to make layered wax melts.
Read our guide on how to choose the right wax and wax melt scents and then get started by using our easy-to-follow recipe.
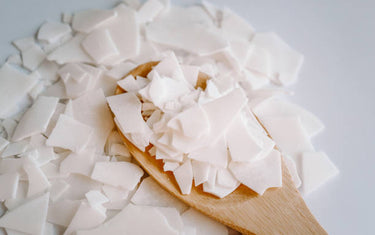
What is the best wax for wax melts?Soy wax is generally considered to be the best wax to use for wax melts, because it has a slower melting point, which ensures it takes longer to burn. We would recommend using either KeraSoy 4120 wax or Golden Wax 494, as these are slow burning, high quality waxes that also help to produce a strong scent throw. |

What is the best fragrance for wax melts?
The best fragrance for wax melts depends on the type of scent you love to smell. There is no right or wrong choice, as it all comes down to personal choice.
And you can use either fragrance oils or essential oils for your wax melt recipe, which gives you lots of scents to choose from.
How long do wax melts last?
The length of time wax melts last when they are being used depends on a few different factors. This includes the size of the melt, the wax used to make it, as well as the dyes and oils that were included in the recipe.
The wax warmer you use to melt the wax will also influence how long the melt lasts for.

How to make homemade wax melts
Before you learn how to make layered wax melts, you’ll need to gather the following:
- KeraSoy 4120 wax or Golden Wax 494
- 50ml of your chosen essential oil
- 3 x 3g of your chosen candle dyes
- 7 x 70g wax melt moulds
- Thermometer
Instructions on how to make layered wax melts
1. Measure the wax
Measure 200g of wax and divide it into 3 saucepans, which can be used for each individual layer of the melt.
If you have any wax left over, put it to one side as you may need to use it for re-pouring later.
2. Melt the wax
Place one of the saucepans onto a medium heat and stir gently as it slowly melts down.
Use your thermometer to check that the temperature is around 60°C or leave the wax to cool on the side before checking again.
3. Add the dye and essential oils
If you are making colour melts, now is the time to add a dye to the mixture.
Check that the dye is around 60°C and add your chosen essential oil.
Add 15ml to the 200g of wax and gently stir until it has been fully absorbed.
4. Pour the first layer
Use the thermometer to check that the temperature is around 55°C, which ensures the wax sets instantly without causing any damage to the mould.
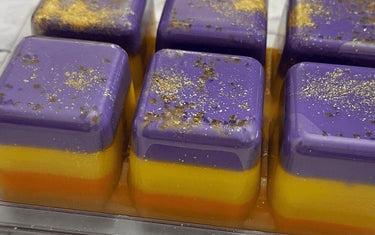
Remember, this is the first of three layers, so only pour enough wax so it fills the mould a third of the way up.
5. Melt the second layer of wax
Once you have left the first layer of wax to set in the mould you can then move onto the second layer.
This simply requires you to follow the exact same process.
6. Adding a second essential oil
Once the temperature is at 60°C, add 15ml of your chosen essential oil for the second layer.
When the first layer has fully set, carefully pour the second layer directly on top of it, ensuring that you only fill it up by another third.
7. Move onto the third layer
Do the same for the third and final layer, and once you have added the wax, leave all three layers to set and cure for at least 24 hours.
8. Remove from the mould
When the wax has fully set, all that’s left to do is to remove the melt from the mould.
It should be ready to use right away, so you can add it to a warmer and start enjoying the wonderful mixture of colours and scents.

Final thoughts
Whether you make wax melts for your own personal use or are thinking of starting an online business selling wax melts, layered wax melts can add a whole new dimension to your enjoyment.
Whilst we have focussed on a triple-layered wax melt in this recipe, you can add as many layers as you like, so with a little practice, there is nothing stopping you from becoming a layered wax melt master.


