7 min read / 12 August 2024 / yasmin sharp
5. Product Development
Discover the art of candle making with tips on fragrance blending, design, branding, and rigorous testing for quality. Learn to create unique, high-quality candles.
Share this post
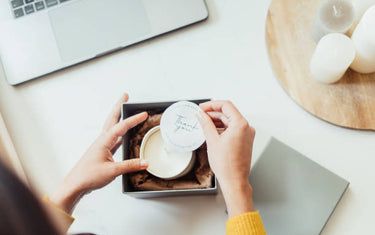
If you want to know how to make candles at home to sell, you’re in the right place.
Thankfully, candle-making isn’t too tricky once you get the hang of it, although it will take practice.
This candle making development guide will walk you through the essential steps of candle product development.
It will also help you ensure that your candles not only look the part but are also safe and reliable for online candle sales.

Scent Blending
When developing your candle product line, there are plenty of key considerations, one of which is scent blending.
Choosing the right essential oil notes or fragrance notes is critical if you want to create a unique set of candles. Below, we’ll break down the basics.
Basics of Fragrance Notes
Fragrance notes are categorised into three layers, each contributing to the overall scent. Here is the purpose of each:
- Top Notes: The initial scents you smell when you light the candle. They are usually light, fresh, and evaporate quickly. Some common top notes include citrus, herbal, and light floral scents. When customers get an initial whiff, this is what they will smell.
- Middle Notes: Also known as heart notes, middle notes form the fragrance's core and emerge after the top notes dissipate. They tend to be more mellow and rounded, including floral, fruity, and spicy scents. Middle notes add some more depth to the scent.
- Base Notes: These help to give it some depth and longevity. They are usually rich and heavy, such as vanilla, musk, and woody scents. They linger long after the top and middle notes have faded, so the smell lasts a while.
Creating Unique Blends
You’ll need to balance the top, middle, and base notes to create a unique scent for your candle. This will likely involve a bit of trial and error, but you can make fun out of it by experimenting with various wholesale fragrance oils for candle making. Here are some tips for making candles to sell:
- Start with a Theme: Pick the mood or theme you want your candle to convey (e.g., relaxing, energising, romantic). This will guide your choice of fragrance oils for candle making.
- Experiment with Ratios: Mix different fragrance oils or essential oils in small batches, adjusting the ratios until you find the perfect blend. This trial and error process will help you decide on what combinations smell good together, and which are less appealing.
- Keep Notes: Note down the ratios of the oils you use so you can easily replicate your favourite scents.
- Test Burn: It is important to test burn your candles to see whether the scent throw is good and that they last. Test one at a time and wait at least 30 minutes to 1 hour between tests so that your senses can recuperate.

Choosing a Colour for Your Candles
If you choose to do so, you can also choose a colour for your candles. While many people leave the wax its original colour, it’s always a fun option if you want to create something funky.
Choosing the Right Type of Dye
First things first, here are the types of dyes you can use:
- Candle Dye Chips: These solid, highly concentrated dyes are fantastic for vibrant, uniform colours and should melt seamlessly with your wax.
- Liquid Candle Dye: Liquid dyes are the best friend of those who love precise control and easy blending. They offer a concentrated punch and mix wonderfully with wax.
- Candle Dye Blocks: These are similar to dye chips but come in larger pieces. You can cut them into smaller bits for customised colour blending.
- Mica or Powder Dyes: Mica can add colour and sparkle, while powder dyes can give your candles some seriously rich hues.
Colour Mixing Techniques
So you’ve selected the perfect colour. But what’s next? Below, we’ll break down how you can add it to your candle.
- Start with a Base Colour: Melt your wax and add a small amount of dye to achieve a base colour. Remember, it’s easier to deepen a colour than to lighten it once it’s too dark.
- Mixing Multiple Colours: Don’t be afraid to experiment! Mix different dyes in small test batches to find unique and captivating colour combinations.
- Colour Consistency: Ensure you stir the dye thoroughly into the melted wax for even distribution. This prevents those pesky streaks or spots in your finished candle.
Testing and Adjusting Colour
A little testing goes a long way in the candle manufacturing process:
- Sample Testing: Pour a small amount of your dyed wax onto a white surface or into a small mould. This gives you a true sense of the colour once it’s cooled and solidified, as melted wax can be deceiving.
- Adjusting Colour Intensity: If the colour isn’t quite right, add more dye gradually. Aim for your desired shade by tweaking the intensity slowly—better safe than sorry!
Colour Stability
To keep those colours vibrant and lasting:
- UV Inhibitors: Consider adding UV inhibitors to your wax mixture, especially if your candles will see the light of day. This helps prevent fading and keeps colours looking fresh over time.
- Shelf-Life Testing: As part of your regular testing, check for any changes in colour. Ensure your candles retain their hue and don’t fade or alter over several months.
Safety and Compliance
Safety first, always:
- Non-Toxic Dyes: Stick to dyes specifically made for candle making. This ensures they’re safe to burn and don’t release harmful chemicals.
- Regulations: Make sure your colourants comply with local regulations and safety standards. You always need to be on the right side of the law and keep your customers safe.

Design and Branding
The next stage of candle product development is your design and branding.
Here are two of the main points that you need to take into consideration, including effective candle marketing ideas that can help your products stand out in a competitive market:
Creating a Brand Identity
Creating your brand identity is exciting, but you need to consider a few key factors.
- Define Your Mission and Values: Consider what your brand stands for and any USPs that set you apart from competitors.
- Develop a Consistent Voice: Crafting a consistent tone of voice will help you craft a strong brand identity with which your customers can connect.
- Visual Identity: Your visual identity should include a logo, colour palette, and overall design aesthetic. It’s worth taking into consideration colour psychology and thinking about how your customers will perceive what they are seeing, as it will be used for marketing and candle packaging design.
- Talk to your customers: Engaging with customers is important, as it helps to build loyalty and encourages repeat business.
Designing Labels and Packaging
The way a candle looks is important to customers. Here are some steps to design eye-catching labels and packaging when making candles to sell:
- Understand Your Brand: Your design should reflect your brand's personality and values. Is your brand modern, rustic, luxurious, or eco-friendly? This will influence your design choices.
- Choose the Right Materials: Select materials that align with your brand image. For example, you could opt for a luxurious glass jar, recycled paper labels, or minimalist packaging.
- Design Elements: Incorporate key design elements such as your logo, colour scheme, and typography consistently across all packaging. Consistency in design builds brand recognition.
- Label Information: Ensure your labels include essential information such as the candle's scent, ingredients, burn time, and safety instructions. Clear and informative labels help provide the necessary safety information.

Testing
Testing is a key part of the candle making process, and will help ensure that your products are safe and appealing for your customers.
Burn Testing for Safety and Performance
Burning tests are fairly straightforward, and you can do them from home. All you need to do is light your candle in a controlled environment and allow it to burn for between 2 and 4 hours.
During this time, you will need to see if the candle burns evenly without excessive flickering, smoking, or forming a carbon buildup (mushrooming) on the wick.
While this is happening, you should also evaluate the following:
- Burn Time: Measure the burn time so you know it matches your product’s specifications. This will ensure that the product information when you’re making candles to sell is correct.
- Scent Throw: Assess both the hot and cold scent throw to ensure the fragrance is strong and remains that way while it burns. This is important if you want to make a high-quality candle that customers will repurchase.
- Container Safety: Ensure the container remains intact and does not overheat during burning.
- Wax Pool Formation: Observe the formation of the wax pool to ensure it reaches the edges of the container evenly without tunnelling. A proper wax pool maximises scent throw and ensures the candle burns down completely without wasting any wax.
Shelf-Life Testing
The final part of the testing phase is shelf-life testing. Testing your candles' shelf-life will ensure they maintain their quality over time, which is essential if you want to keep costs down.
- Fragrance Stability: Check that the scent does not fade or change over time. Stable fragrance oils for candle making are key to achieving product longevity.
- Colour Retention: Check for any discoloration over 1-2 months.
- Texture: Check that the wax is smooth and doesn’t start to frost or crack over time.

In Summary
By carefully following each step of the candle-making development process, you can create high-quality candles that are ready to fly off the shelves! From understanding fragrance notes to crafting unique blends, each aspect of product development plays an important role in creating a market-ready candle.
If you need any fragrance oils for candle making on a budget or as a small candle business, consider signing up for a Nikura wholesale account. Here, you will find exclusive deals on some of our best-selling scents for candles.

