7 min read / 12 August 2024 / yasmin sharp
2. Basics of Candle Making
Explore various candle types including pillar, container, votive, taper, and tealight. Learn essential materials and equipment for perfect candle making.
Share this post
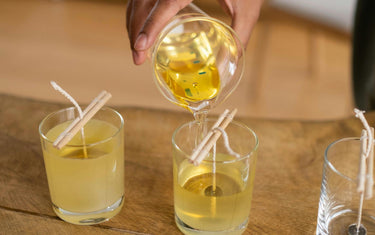
Learning how to make candles is well worth the time and effort – but it’s always a good idea to do a little research before you get started so you can enjoy the best results.
Here we cover the basics of candle making, giving you the lowdown on the different designs, materials and equipment involved in the process, so you can master how to make the perfect candle.

Types of Candles
Some of the most popular types of candles include:
Pillar candles
Pillar candles are designed in a cylindrical shape and are often made from paraffin wax. They are free-standing and do not need to be placed into a container. Many people use them for mood lighting or to add a decorative touch to the space.
Container candles
A container candle is wax that has been poured into a non-flammable container, usually made from glass or metal. They can have single or multiple wicks and be unscented or scented and cleaned and reused once the original candle has finished.
Votive candles
Votive candles tend to come in white containers (although other colours are available) and they can be left to burn into the holder they are placed in. Place them on the coffee table, mantlepiece or shelving to create a calming ambience.
Taper candles
Taper candles have a more formal, elegant design, which often sees them used for table settings. They are long, thin, cylindrical candles that usually stand at 12 inches in height, and are placed into a holder before being lit.
Tealight candles
Tealight candles are packaged in a plastic or metal container and are the smallest candle design you can make. They are mostly used for decoration in groups of least 2 or 3, making them ideal for accenting lighting or as décor accessories.

Essential Materials
From wax and wicks to fragrances and dyes, there is a list of essential materials you’ll need to make the perfect candle.
Wax
Wax is the most important of all materials for candle making. There are different types of candle waxes available that all have their own benefits and features, allowing you to find the perfect wax for your candle making needs. Learn how to make the right choice of wax when it comes to your candles.
Most candlemakers tend to use:
- Paraffin wax: This is one of the most cost-effective types of wax for candle making. It is made from petroleum, coal and oil shale and can be used to make a variety of candles, from pillars to containers.
- Soy wax: Soy wax is extracted from soybeans, making it 100% natural and it produces a slow, soot-free burn. When used as supplies for candles, it comes in the form of flakes, which makes it easy to work with.
- Beeswax: Beeswax is another 100% natural wax, as it is sourced from beehives. It has a signature golden colour and produces a subtle honey scent (also soot-free) if burnt without added fragrance.
- Palm wax: Extracted from palm oil, this type of wax is ideal for free-standing candles. It can be a more expensive option, although it does tick a lot of the sustainable boxes and offers a long burn time.
- Coconut wax: Vegans tend to prefer using coconut wax as it offers a sustainable choice. It has a slow, even burn and does not release a lot of soot once lit. The wax is odourless and is known for carrying scent very well.
Wicks
Wicks are another item high on the list of essential supplies for candles. Learn how to choose the best wick size for your candles.
Popular options for candle making wicks include:
- Cotton wicks: These are made from natural fibres and are typically used for scented candles. They are eco-friendly, durable, easy to light and tend to produce a long, stable burn.
- Paper wicks: Made using a combination of paper and cotton fibres, paper wicks blend the naturalism of cotton with the rigidity of paper. This makes them ideal for scented candles, as they will not drown or bend as the wax melts.
- Wooden wicks: This is a contemporary addition to the wick range. They have a wide, flat shape that produces a horizontal flame, which gives it a minimalist style. Wooden wicks create a larger melt pool, which helps to create a stronger scent throw.
- Linen wicks: Linen wicks can absorb a large amount of wax which allows for a longer burn time. Many people use them in beeswax candles for this reason, as they are known for producing extended burn times.
- Zinc wicks: One of the biggest pluses of using zinc wicks is their consistent and slow burn rate. Because of their design, they form a larger melt pool, making them ideal for candles with large diameters.
Fragrance oils
When learning how to make candles, you may decide to use fragrance oils. These types of oils are designed specifically for use in candles, soaps and perfumes and are engineered to create a long-lasting “scent throw” that adds to the ambience of the room. Fragrance and essential oils for candle making are the perfect solution for creating your own custom scent profiles.
Fragrance oils for candles are man-made to imitate a naturally occurring scent. For example, where some bring to mind the smell of freshly cut roses or the scent of the ocean, others recall the aroma of freshly baked cinnamon or newly washed linen.
Learn how to make candles with fragrance oils.
Dyes and colourants
You can add a pop of colour to your candles to make them really stand out. Liquid dyes, grain dyes or mica powder give you a lot of colour options, depending on which one suits your style better.
Whether you go for block colours or mix and match to create a unique colour palette, there is no real limit to the patterns you can create on your candles.
Containers and moulds
If you are not making free-standing candles (such as pillars or tapers) then once the wax has been melted and fragrances and colour dyes added, it will need to be poured into a container or mould.
You can use glass or plastic jars and add your own decorations, or you’ll find plenty of places to buy moulds online. They come in all shapes and sizes, so it all depends on how creative you want to be.
Learn how to make your own candle moulds.

Basic Equipment
As part of your list of supplies for candles, you’ll also need basic equipment such as:
Melting pot
When candle making, the wax should always be melted in a double boiler. This involves using a heat-proof bowl filled with your wax that can sit over a pot containing boiling water. It’s the safest way of melting wax as it prevents combustion and retains the integrity of the material.
Thermometer
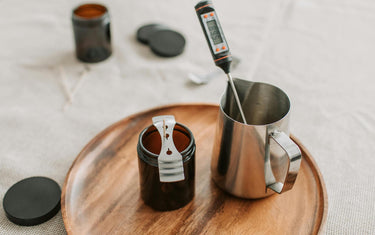
One of the basics of candle making is keeping track of the temperature. Using a thermometer allows you to judge the melting temperature, as well as the right time to add fragrances and dyes and when to pour the wax into the container or mould.
Stirring utensils
To help the wax melt and to blend in any dyes or fragrances, you should ideally have a dedicated stirring utensil for the job. Most people use a silicone or wooden spatula for stirring.
Pouring pots
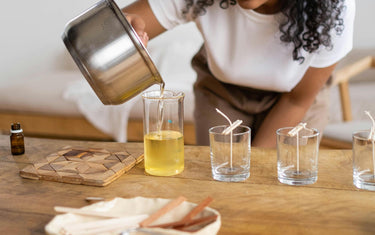
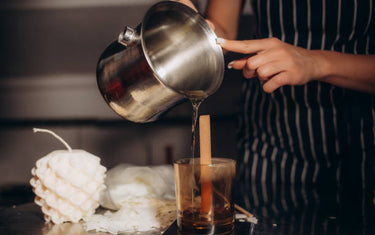
A pouring pot is an essential piece of candle making equipment as it gives you more control when transferring melted wax into your container or moulds. Once ready, simply transfer the melted wax into the pour pot and use the funnel to guide the liquid into your container or mould.
Safety gear
Safety is a critical part of candle making, as you are handling hot wax and other volatile materials during the process. Safety gear you should use includes:
- Heat-resistant gloves for handling hot wax
- Long-sleeved and legged clothing to protect skin
- Eye goggles to protect against hot wax splashes
- Fire extinguisher to hand in case of an accident
- First aid kit to tend to any minor injuries
Common Candle Making Mistakes
Candle making is a rewarding and creative hobby, but it can also be tricky for beginners.
Here are some common mistakes to avoid to ensure your candles turn out beautifully every time:
- Incorrect Wax Temperature - Pouring wax at the wrong temperature can cause cracks or uneven surfaces. Always use a thermometer to monitor the wax temperature.
- Using the Wrong Wick Size - A wick that’s too small leads to weak flames, while one that’s too large causes soot and excessive burning.
- Not Measuring Ingredients Accurately - Inaccurate measurements can affect scent and colour. Use a digital scale for precise measurements and follow recommended ratios.
- Skipping the Cure Time - Using candles immediately after pouring can diminish scent throw and burn quality. Allow them to cure for at least 48 hours for best results.
- Neglecting Safety Precautions - Always prioritise safety by wearing protective gear and working in a well-ventilated area. Follow safety guidelines for your materials.
- Overloading with Fragrance Oils - Adding too much fragrance can lead to poor burning and excessive smoke. Stick to recommended fragrance load percentages.
- Ignoring Wick Placement - Improper wick placement can cause uneven burning. Use wick holders during cooling to ensure proper centering.
By being aware of these common candle making mistakes, you can enhance your skills and create beautiful, functional candles that you’ll be proud to share or sell.
If you're interested in learning how to make candles at home, remember that practice makes perfect, so don’t be discouraged by initial setbacks—learn from them and enjoy the creative journey!

Mastering candle making is a delightful journey that blends creativity with practical skills. As you've seen, there's a wealth of options to explore, from elegant tapers to cosy container candles.
Remember to prioritise safety, choose your materials wisely, and don't shy away from experimenting with different waxes, wicks, and fragrances. With practice and patience, you'll soon be crafting beautiful, aromatic candles that fill your home with warmth and light.
Whether you’re looking to make your own candles as a fun craft hobby, or sell your creations as a part of a candle making business, our online store has everything you need. Sign up for our wholesale account today to enjoy savings on our range of products, and get started on your own personal candle making journey.
So gather your supplies, set up your workspace, and let your creativity shine as brightly as the candles you're about to make. Happy crafting!


