8 min read / 12 August 2024 / yasmin sharp
3. Candle Making Process
Nikura's ultimate candle making guide covers preparation, wax selection, melting, fragrance, pouring techniques, and troubleshooting common issues for perfect candles.
Share this post
How to Make Candles: A Step-by-Step Guide to the Candle-Making Process
Whether you want to create a personalised gift or start a new hobby, understanding how to make candles can feel daunting if you don’t have much experience.
However, DIY candle making is a fantastic way to learn at your own pace while unleashing your creativity. With the right guidance and materials, you’ll soon find yourself crafting beautiful candles with ease.
Below, we’ll break down how to make candles into an easy-to-understand guide.
Preparing for Candle MakingGathering the correct supplies is the first step in the candle-making process. This will help the process run smoothly. What You’ll Need:
Once you have everything, set it up at an appropriate workstation. Your workstation area should be well-ventilated and preferably have a heat-resistant, flat, secure surface. You should also ensure it’s away from any pets and children. |

Choosing the Right Wax
Choosing the right wax can significantly impact how your candles turn out, so it’s essential to consider all your options. We’ll break them down for you below.
Types of Wax for Candle Making
There are several types of wax you can use, each with its own unique characteristics:
- Paraffin Wax: This is the most common type of wax used in the process of candle making. It’s easy to work with, holds fragrance well, and has various melt points. However, it’s not the most eco-friendly option as it’s petroleum-based.
- Soy Wax: Soy wax burns much cleaner than paraffin wax and is biodegradable, so it’s ideal if you’re looking for something suitable for eco-friendly candle making. It holds fragrance well but has a lower melting point, which some people find harder to work with.
- Beeswax: Known for its natural honey scent and long burn time, beeswax is a good choice if you want to make high-quality candles. However, it tends to be more pricey and has a higher melting point, requiring careful temperature control.
- Palm Wax: This wax creates unique crystalline patterns and is often used for decorative candles. It’s a sustainable option but can be challenging to work with due to its high melting point.
Now that you know a bit more about the different types of wax for candle making, it should make the process of making a candle much easier.
However, this isn’t the only thing to consider. You should also calculate how much wax to use for your candles and choose the correct wick and container.
Selecting Candle Wicks and Containers
Believe it or not, candle wicks can considerably impact how your candle functions. To create the perfect candle, you want to pick the proper wick.
Choosing the Right Candle Wicks
Candle wicks are essential for ensuring your candle burns evenly and safely. The wick's type and size depend on the wax type, the container's size, and the amount of fragrance you’ll be using.
- Cotton Wicks: These are the most common and versatile types of wicks and are suitable for most types of candles.
- Wood Wicks: Wood wicks create a unique crackling sound, and work well with natural waxes like soy and beeswax.
Choosing the right wick can be a bit of trial and error, but getting a perfect burn is worth the effort. If you’re unsure, some benefits of a wood wick include a rustic look, wider melt pool, stronger fragrance throw, and unique crackling sound. However, it may burn faster and require more maintenance.
On the other hand, a cotton wick offers a more traditional look, steady flame, more prolonged and quieter burn, and easier maintenance.
Selecting Containers
Now for the most exciting part—selecting a container for your candle! Whether you want something modern or wacky, this is a great chance to get creative with your candle making.
Here are some of the most popular options:
- Glass Jars: Durable and heat-resistant, perfect for a variety of candle types.
- Tins: Lightweight and portable, ideal for travel candles.
- Moulds: These are used for pillar candles and other shaped candles.
For safety, make sure your containers are heat-resistant and suitable for the process of candle making. This is very important; otherwise, your carefully crafted candles could become a fire hazard.

Candle Making Techniques
Melting and Mixing Wax for Candle-making
Now that your supplies are ready, it’s time to start the exciting part – melting and mixing your wax.
How to Melt Candle Wax Safely
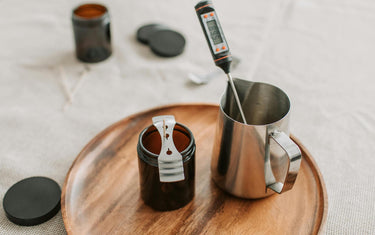
The first step in the candle-making process is melting the wax. Melting wax safely is crucial to prevent accidents and ensure the wax reaches the correct temperature.
If you don’t know how to melt candle wax, don’t worry. Here are two simple ways you can do it:
- Double Boiler Method: Place your wax in a heat-resistant container and melt it over a pot of simmering water for gentle and even heating.
- Dedicated Melting Pot: A specialised pot designed for melting wax can make the process easier and safer.
Always keep an eye on the temperature and never leave melting wax unattended. This way, your wax melting process will be safe.
Adding Fragrance and Dye
Once your wax is melted, you can move on to the next step: adding your fragrance oil or essential oil of choice.
Adding fragrance and dye to your candles allows you to create personalised scents and colours. Here’s a breakdown of each:
- Fragrance Oils: These are specially formulated for candle making. For a warm and cosy aroma, try our vanilla fragrance oil.
- Essential Oils: Natural and therapeutic, they are a great option for those looking for a natural fragrance. However, their scent may not last as long as a fragrance oil and are more likely to combust at candle-making temperatures compared to some fragrance oils.
- Dye: Candle dyes come in liquid, chip, or block form, which you can mix to create custom colours.
Mix your fragrance and dye into the melted wax at the right temperature to ensure even distribution. If you don’t know how much to add, use 5-10% fragrance oil by weight of the wax.
For example, for 500 grams of wax, add 30 to 45 millilitres of fragrance oil. You can also test small batches to find the perfect ratio.

Temperature Control in Candle Making
Maintaining the correct temperature is essential for adding fragrance and dye, so you get a smooth finish. While you’re making your candles, you should keep these ideal temperature ranges in mind for each type of wax:
- Soy Wax: 49-60°C
- Paraffin Wax: 77-82°C
- Beeswax: 63-79°C
- Palm Wax: 93°C
By monitoring the temperature and keeping it in check, you’ll increase your chances of making a good quality candle. Next, we’ll move on to the final steps of the candle making process.
Pouring and Setting Candles
By now, the candle making process should almost be complete. With your wax melted and mixed, it’s time to pour and set your candles.
Pouring Techniques for Candle Making
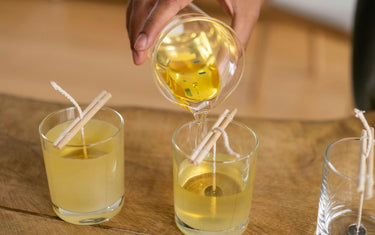
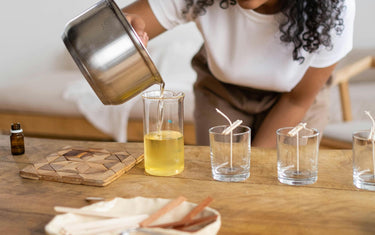
Using the correct candle pouring techniques helps avoid common issues like bubbles and sinkholes.
Here are some tips:
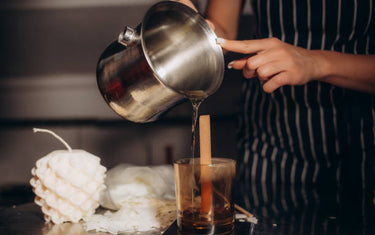
- Slow Pouring: Pour the wax slowly and steadily to minimise air bubbles.
- Temperature Control: Ensure the wax is at the correct pouring temperature to prevent cracking and get a smooth surface.
Preventing and Fixing Common Issues in Candle Making
Candle-making can sometimes lead to imperfections like bubbles, sinkholes, or uneven surfaces. However, don’t worry, there are ways that you can fix these issues.
- Bubbles: To prevent bubbles in your candles, pour your wax slowly and tap the container gently to release any sneaky air bubbles.
- Sinkholes: To prevent sinkholes, allow your candle to cool slowly. You can top it off with additional wax if necessary.
- Uneven Surfaces: Ensure consistent pouring temperature and lay your candles on a flat surface while they cool down. Don’t succumb to the temptation to move them around anywhere during this time.
Cooling and Setting Times
While it can be easy to think otherwise, cooling and setting times are actually an important part of making candles. You need to get it right if you want to create high-quality candles.
However, cooling times vary depending on the type of wax you use to make your candle. Let’s take a look at the cooling times below:
- Soy Wax: 24 hours
- Paraffin Wax: 4-6 hours
- Beeswax: 24 hours
- Palm Wax: 24-48 hours
While paraffin wax tends to cool quickly, the other three types of wax take considerably longer. Keep them in a well-ventilated area on a flat surface, away from pets and children, and wait for the magic to happen!
Cure Times
Cure times are equally important when it comes to achieving the best fragrance throw and ensuring your candles burn properly. Curing allows the wax and fragrance oils to fully bond so you get a good end result. Here are the recommended cure times for different types of wax:
- Soy Wax: At least 3 days
- Paraffin Wax: At least 2 days
- Beeswax: 1 week
- Palm Wax: 1-2 weeks
Make sure to store your candles in a cool, dark place during the curing process. Proper curing will have a positive impact on the longevity of your candles so they smell great and burn efficiently.
Once the candles have set, you can use them just as you would with any store-bought candle. Just make sure you follow the same safety precautions and enjoy!

Candle Making Recipes
Now you're more familiar with some techniques for candle making, check out and try some of our candle making recipes below:
- How to Make Candles at Home
- How to Make Pillar Candles
- How to Make Beeswax Candles
- How to Make Coconut Candles
- How to Make Wood Wick Candles
- How to Make Large Batches of Candles
For even more guides on how to make candles and troubleshoot problems, browse our candle making blogs.

Now, you should have a better idea of making candles from home. By following these steps and tips, you can create beautiful, high-quality candles that are ideal for any occasion.
If you want high-quality fragrance oils at a discount, then sign up to our wholesale for exclusive deals. It’s ideal, whether you love making candles for fun, or own your own successful business.


