5 min read / 7 June 2023 / Laura Garvin Gomez
How to Make Pillar Candles
Learn how to make elegant-looking pillar candles for your home with this easy, step-by-step recipe.
Share this post

There's no piece of home decor more stunning than a pastel-coloured pillar candle.
Sleek and elegant, adorning your home with pillar candles will not only create an air of relaxation but also of quiet luxury and peace. What more could you want, right?
While there are many pillar candle options available in stores, they don't always tick all the boxes we want them to. Plus, it's difficult to know exactly what ingredients have gone into making them.
Instead, why not try making your own pillar candles from home? Pillar candles, like most candles, are relatively easy to craft once you get a good grasp of the basics. They're also endlessly customisable, which makes them a great choice as a homemade gift for your loved ones.
We've condensed all you'll need to know into this quick and handy guide, so let's get crafting!
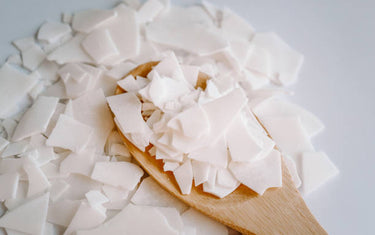
What kind of wax should I use when making pillar candles?Your wax type will impact the way your candle burns, so it's important to choose one that's best suited to you. Candle waxes will also have varying ingredients and ethical implications that may impact your choice. Paraffin wax, for instance, is used for most commercial candles but is a by-product of the petroleum industry. Its crude oil production has a direct and negative effect on our ecosystem, which has led to unpopularity for this wax type in recent years. Paraffin wax is also known to release harmful chemicals into the air, including two carcinogens and an excess amount of soot. For these reasons, many candle makers now opt for natural choices like soy wax or coconut wax instead. Learn more about the different wax types and their characteristics. |
Can I add fragrance oil to my homemade pillar candle?
A lot of commercial pillar candles are odourless, but you can also find versions that are modelled in the same way as traditional scented candles.
If you prefer to have a gentle aroma circulating in your home, feel free to add your choice of fragrance oils or essential oils to the mix.
Fragrance oils will offer more versatile scent options like fresh linen or apple and cinnamon, while essential oils will focus on natural, botanical aromas like lavender oil or rosemary oil.
Whichever you choose, make sure that you're not adding more oil than your candle wax can sustain. Typically, a fragrance load of 10% is recommended for most candle waxes. Learn more about how much fragrance oil to add to a candle.

How to make pillar candles
Once you have your wax and your scents picked out, it's time to start making your pillar candles! The most technical part of this process will be the wick, so make sure you're picking one that's long enough to fit in your candle.
Here's how to make them.
You will need:
- 447g of your chosen candle wax
- 28g of your chosen fragrance oils OR essential oils (optional)
- Candle wicks
- Glue dots
- Candle pillar mould
- Heatproof glass bowl
- Saucepan OR double boiler
- Spatula/mixing spoon
- Thermometer
- Wick centring tool (optional)
- Candle dye (optional)
Pillar candles - how to make:
- Prepare your wicks: Cut your wicks so that they're 3-4 inches longer than the height of your mould. Stick a glue dot onto the bottom of your wicks and gently but firmly attach them to the centre of the mould. If your candle wick is off-centred, it will affect the way your candle burns, so make sure you're accurate!
- Secure your wicks: If you're using a wick centring tool, add this to your wicks to help keep them in place. If you don't have one to hand, use pencils or a pair of chopsticks instead.
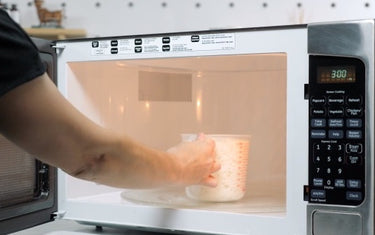
- Melt the wax: Add your wax to a heatproof glass bowl. Fill a saucepan with water and heat it gently on the stove. Once warmed, carefully place the glass bowl with the wax on top of the water. Use your thermometer to monitor the temperature of the wax as it melts. Do not let it exceed 80°C.
- Add your scents and dyes: Once melted, take your wax off the stove. If you're adding any oils or dyes, wait until the wax cools to 70°C before sprinkling these in. Mix all the ingredients together with a spatula or mixing spoon until fully combined.
- Pour your wax: Transfer your wax from the heatproof bowl to a measuring jug (or any other kind of heatproof jug you have available). This will make the wax easier to pour. Carefully pour the wax into each candle mould, making sure your wicks don't shift in the process. Pour evenly on each side to avoid any air bubbles.
- Let your candles cool: Let your candles sit undisturbed for 24 hours as they set. Once hardened and cooled, carefully take them out of their moulds.
- Enjoy! Trim your candle wicks to the desired length. You're ready to use your new, homemade pillar candles!
What if my candles don't look as expected?
Candle woes are very common when you're first starting out, so don't lose hope! They can happen to even the most experienced candle makers from time to time.
If your candles don't quite turn out the way you want them to, there are a number of quick fixes you can employ to try and resolve the issue. Have a look through our candle making tips for beginners to help you along the way.
If the candle is still completely unfixable, that's okay too. You now have the knowledge to try again! With a bit of trial and error, you'll achieve perfect pillar candles in no time.

Homemade pillar candles are not only a lot of fun to make, but they're also cheaper, more versatile, and better for the environment. Once you get the hang of the technique, you'll be wanting to make heaps of new varieties to adorn your home.
If you're interested in making other types of candles for your home, why not try our homemade tea light candle or coconut candle recipes? You can also learn how to sell your homemade creations to the world as a fun and creative side project.


