5 min read / 29 June 2023 / Laura Garvin Gomez
How to Make Gel Wax Melts
Master the art of crafting mesmerising gel wax melts with our expert guide.
Share this post
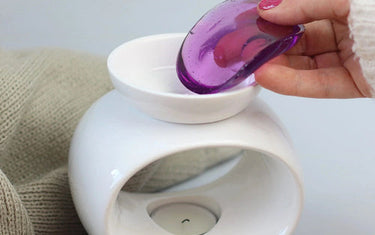
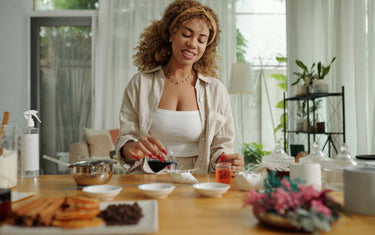
Gel wax melts are a lot of fun to make, with their translucent appearance allowing you to add a whole host of embeds, colours and fragrances to create unique designs.
Compared to traditional wax melts, they are also less messy to clean up after they have finished burning, so you can simply peel the wax away to leave behind a clean tray.
If you want to learn how to make gel wax melts, we’ve put together a step-by-step guide for you to follow.
What are gel wax melts?Gel wax melts are like other types of wax melts and are burnt in exactly the same way. The main difference is the type of wax used in the recipe, because instead of using soy, beeswax or palm wax, gel wax is used as the base, whilst any additional colours or fragrances (such as fragrance oils) are added in the same way. |
Can you reuse gel wax melts?
You can reuse gel wax melts because no matter how many times you burn them, the gel will not evaporate.
However, as with any other type of melt, the fragrance will expire over time, although it will last longer than melts made from soy, beeswax and more traditional types of wax.
You should expect a gel wax melt to give you up to 40 hours of burn time, as the gel has a much higher melting point.
To get the most out of your melt, turn it over after every use (ensuring the gel wax melt has cooled) so the fragrance can disperse evenly around the room.
Before we get started with how to make gel wax melts, remember you can sign up as a wholesaler to access all of our bulk business prices including great offers on gel wax supplies.
It’s totally free to sign up for access to our wholesale products and there’s no minimum order to qualify.

How to make gel wax melts
To make great gel wax melts, you’ll need to gather some equipment and ingredients. Check that you have the following ready in the kitchen:
- Essential oils or fragrance oils
- Gel wax
- Candle dye (optional)
- Glass or plastic containers/moulds
- Double boiler
- Stirring utensil
- Pouring jug
- Weighing scales
- Thermometer
How to make gel wax melts method
To learn how to make jelly wax melts, follow the steps below:
- Prepare the wax: Ensure you have a clear and clean space to work with and then weigh 100g of gel wax and set it aside.
- Melt the wax: Take a medium-sized pan and pour about two inches of water before turning on the heat until it starts to simmer. Next, take a heat-resistant container that fits neatly into the pot, with the base sitting just above the water without touching it. Add 100g of gel wax to the heat-resistant container. Do not allow the heat to go up above 110°C, and continue to gently stir the gel until it is fully melted.
- Add the colour dye: Take the pot off the heat and add the colour dye. The best way to do this is by pouring a small amount at a time, and mixing it in until you achieve your desired colour tone.
- Mix in the fragrance: Use a 10% fragrance ratio for your gel wax melts, which equates to 10g of essential or fragrance oil for 100g of gel wax. Pour it into the mixture and gently stir.
- Let the wax cool: Pour the gel into containers and set aside so the wax can cool. This will take about 3-4 hours, and then the melts are ready to use.
If you want to decorate your wax gel melts for burners, you need to do this before step 1. Flowers and petals are a lovely addition, or you can try wax pieces or fruit.
Once the wax is added, you should only see minimal movement, and you can adjust the embeds with tweezers if needed.

Whether you are learning how to make gel melts in the UK or anywhere else, you can use our step-by-step instructions above to make the process much easier.
Most people choose to buy ready-made gel wax, but if you want to go a step further you can also make your own by combining thermoplastic resin powder and white mineral oil, although the instructions are a little more complicated.
Ready to turn your passion for making gel wax melts into your very own business?
At Nikura, we believe that everyone deserves the opportunity to pursue their dreams and turn their hobbies into successful ventures.
Whether you're a seasoned wax melt maker or just starting out, we're here to support you on your journey.
Here's how you can get started:
- Master Your Craft: Before diving into the world of wax melt selling be sure to hone your skills, experiment with different fragrances and designs, and strive for excellence in every creation.
- Develop Your Brand: Establish a unique identity for your business by creating a compelling brand story, logo, and packaging. Consider what sets your wax melts apart from the competition and communicate that to your customers through your branding.
- Create Your Product Line: Which types of wax melts do you want to sell? Develop a product line that feels right for you.
- Source Quality Materials: Invest in high-quality ingredients and materials to ensure that your customers love your wax melts. With Nikura you can sign up as a wholesaler. Joining our wholesale program is quick, easy, and completely free!
- Wholesale Fragrance Oils and Essential Oils: Enhance your wax melt creations with our wholesale fragrance oils and essential oils, specially crafted for people turning their hobby into a business, just like you.
- Comply with Regulations: Familiarise yourself with local regulations and safety standards for making and selling wax melts in your area. Ensure that your products meet all legal requirements and adhere to industry best practices for safety and quality. Check out our CLP Complete Guide.
- Set Up Your Workspace: Create a dedicated workspace equipped with all the necessary tools and equipment. Keep your workspace clean, organised, and free from any potential hazards to ensure a safe and efficient production process.
- Market Your Products: Develop a marketing strategy to promote your gel wax melts and attract customers to your business. Use social media, online marketplaces, and local events to let people see your wonderful products.
- Start Selling: Once you're confident in your product and branding, it's time to start selling! Whether you choose to sell online, at local markets, or through retail partnerships, find the sales channels that work best for your business and start sharing your gel melts with the world.
At Nikura, we love to help aspiring hobbyist turn their passion into profit.
From expert guidance and resources to premium supplies and ongoing support, we're here to help every step of the way.
Don’t forget you can also sign up for wholesale gel wax supplies to access all of our bulk business prices. It costs nothing to sign up as a wholesaler and there’s no minimum order required.


