6 min read / 23 January 2024 / yasmin sharp
Melt and Pour Soap Recipes and Guides
Explore the world of melt and pour soap making, perfect for beginners and soap making enthusiasts alike.
Share this post
Is melt and pour or cold pressed better?
How much fragrance to use in melt and pour?
Recipe: Equipment and ingredients
Melt and pour soap recipes offer a great way for beginners to learn the basics of soap making.
Whilst the idea of making a soap from scratch can feel daunting, using the melt and pour process removes many of the complications and is something that even children (under supervision) can get involved with.
In this article we’ve put together a few melt and pour recipe ideas for you to try, along with the basic procedure that you can use to make all kinds of new and exciting soap creations.
Is melt and pour soap better than cold pressed soap?Whether you use melt and pour soap recipes or cold pressed recipes is entirely up to you. However, most people find the melt and pour process easier to follow, as you do not need to use lye (caustic soda or sodium hydroxide) and deal with some of the other complications that come with using the cold pressed process. You can make soap quickly and easily by following a melt and pour recipe, making it the perfect start point for beginners. |
How much fragrance do I use in melt and pour soap recipes?
It is recommended that the scent ratio for your melt and pour soap is no higher than 3%, which applies to both fragrance oils and essential oils.
This means that no more than 3% of the total weight of the soap is made up of these types of oils.
To know the final weight of your soap before you start work on the recipe, simply fill one of your mould cells with water and place it onto some kitchen scales.
This will give you a rough weight guide, but it is a good idea to add another 10% to the weight, just to be on the safe side.

Melt and pour soap recipes: equipment and ingredients
Before you get started on your melt and pour recipe, you’ll need to gather the right equipment and ingredients needed for the task.
Use the lists below as a check-off guide to help you along:
- Kitchen weighing scales
- Microwave or double boiler
- Sharp knife
- Thermometer (optional)
- Heat proof jug (for microwave) or glass bowl (for double boiler)
- Cling Film wrap (optional)
- Spatula
The ingredients you’ll need for this melt and pour recipe are:
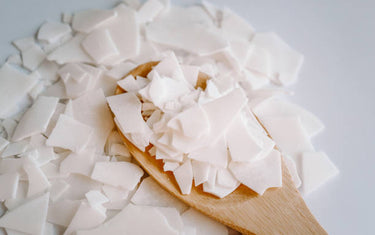
- SLS free melt and pour soap base (300g)
- Floral fresh linen fragrance oil (6g)
- Pink Mica powder (1g)
- Rubbing alcohol or isopropyl alcohol in a glass spray bottle

Melt and pour soap recipes: step-by-step instructions
There are lots of melt and pour soap recipes available online, but the tricky part can be finding one that appeals to you.
We've put together a few recipe ideas that could be just what you are looking for or perhaps give you some inspiration to create your own from scratch:
Step 1
Set the scales to zero and place the bowl or jug onto the scales before cutting the melt and pour base into small cubes until you have 300g.
Step 2
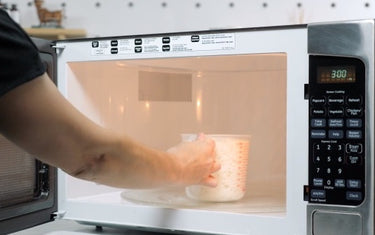
If you are using a microwave, use the Cling Film to cover the jug (to retain moisture) and heat the base in 30 second bursts until it is fully melted.
Another option is to use the double boiler method on the cooker, by placing a glass bowl over a saucepan of boiling water.
When the base Is melted, spray some rubbing alcohol to break up the bubbles before replacing the Cling Film.
This will keep the base airtight and prevent skin from forming on the surface.
Try to keep the temperature of the soap base between 68-70 degrees, if possible, as overheating it can damage the chemical balance.
Step 3
Add the required amount of Mica powder to the base, before stirring until you cannot see any lumps.
You may want to spray a little more alcohol into the mixture as it can speed things up a little.
Step 4
Once the melted base has cooled to 60 degrees or below, you can add in the fragrance.
If a skin has developed or the temperature is much lower, give the mixture another 10-15 seconds blast in the microwave before adding the fragrance.
Mix in the fragrance for a minute or two and if you see any bubbles forming, spray a little more alcohol.
Step 5
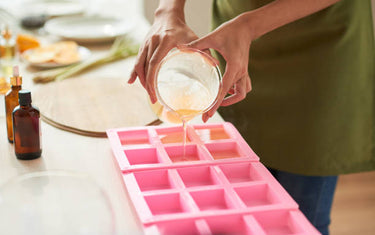
Before pouring the soap into the mould, spray some alcohol into the cells as this helps the liquid get into every corner to reduce the appearance of bubbles.
Pour slowly, as going too fast can cause splashes and bubbles.
Spray the top of the soap with rubbing alcohol to remove any bubbles that may have formed, then place the mould tray somewhere it will not be moved or touched until it is set.
Step 6
Leave the soap to set for about 4-6 hours.
Once it is ready and hardened you can then remove it from the mould.

Melt and pour soap recipes: other ideas to try
The great thing about melt and pour soap recipes is that you can use the same process described above and simply replace the ingredients with anything you want to use.
Some other ideas you could try include:
Lemon honey melt and pour soap recipe
For this recipe you’ll need:
- 1lb (450g) honey melt and pour soap base
- 15-20 drops lemon essential oil
Follow the same steps we’ve outlined above and add in the lemon essential oil after the soap base has melted and cooled.
Clay eucalyptus melt and pour soap recipe
Eucalyptus clay soaps are great for drawing out impurities from the skin, with the eucalyptus oil creating a soothing, calming effect:
- 4lb (2.267 grams) goat milk base
- 1 tsp French clay powder
- 1 tsp melted coconut oil
- Eucalyptus essential oil
- Eucalyptus leaves
After melting the soap base add in the melted coconut oil and leave it to cool to the right temperature before mixing in the other ingredients.
Citrus melt and pour soap recipe
Citrus soaps can feel incredibly light and refreshing and are a great addition to any bathroom.
This recipe also involves using dried citrus slices, which we’ll explain how to make below:
- 4lb (2.267 grams) goat milk base
- Citrus essential oil (our Citrus Relief Essential Oil Blend combines bitter orange, grapefruit, lime and cypress)
- Dried citrus slices
To make the dried citrus slices, cut them thinly (about 1/8 of an inch), whilst bearing in mind the size of the moulds you are using.
Place the citrus slices on a wire rack on top of a pan and place into the oven.
Let them cook for about 2-3 hours at 200 degrees.
Once cooled, place the dried citrus slices into the bottom of each mould.
When the soap base is ready for pouring, proceed as normal and allow the soap to dry before enjoying the citrusy goodness.

You don’t need many ingredients to tackle melt and pour recipes and you should have most of the equipment you need at home already.
The cooking part of the recipe only takes around 30-40 minutes, so it won’t take up too much of your time, and then you can leave your wonderful new soap creations to cool and harden for the rest of the day.
Always take care during the melting, mixing and pouring stages, as the melted soap can get very hot and you don’t want to pick up any burns or skin marks that have been caused by hot splashes.


