5 min read / 25 May 2023 / Laura Garvin Gomez
How to Make Whipped Soap
Learn the art of crafting delightful whipped soap at home with our comprehensive guide, elevating your self-care routine to new levels of luxury and indulgence.
Share this post

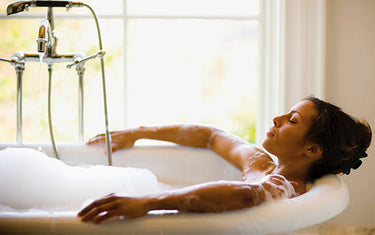
Whipped soaps have been on trend for the past year or so, and it’s easy to see why, with their luscious textures, swirls of bold colour and beautiful scents combining to transform your time spent in the bathroom.
When you add in one or two of your favourite essential oils, you can also give your skin some real VIP treatment.
Here we explain how to make the ideal whipped soap base recipe, giving you two different methods that are suitable for beginners and more experienced soap makers.
- Prepare: Weigh out all ingredients and prepare your workspace. Ensure safety gear and equipment are ready.
- Whip the Base: Chop the soap base into small pieces and whip until it achieves a creamy, fluffy consistency, similar to whipped cream, using an electric mixer.
- Add Other Ingredients: Incorporate oils, additives, and any other desired components into the whipped base.
- Colour: Divide the whipped base among multiple containers and add different colourants to each. Options include mica powders, neon pigment colours, or water-soluble dyes.
- Pipe or Pour: Pour or pipe the whipped soap into containers using a piping bag for a decorative effect.
- Store: Cover the whipped soap to prevent drying and store in a container with the lid sealed tight to maintain freshness.
What is whipped soap?Whipped soap is a soft soap bar that you can use in the bathroom instead of a traditional soap bar or body wash. The texture is totally unique with a luxurious soap base, adding a sense of luxury to your time spent in the bathroom. Whipped soaps also work well as a shaving cream, giving you a hydrated shave thanks to the moisture and rich lather it can create on the skin. Compared to other soaps, the ingredients are a little different, which is key to producing the soft, buttery texture. Many people prefer this type of soap as they feel it offers more of a feel-good factor because it feels so good on the skin. And as with other makes of soap, you can use it for simple handwashing, in the bath or shower or as a shaving cream. |
What are the benefits of whipped soap?
The light, soft texture of a whipped soap base feels luxurious on the skin, and when combined with a blend of essential oils, it can offer a variety of health benefits.
Essential oils are packed with a wide range of vitamins and nutrients that can help to hydrate and nourish your skin. For example, Lavender Essential Oil is incredibly versatile and also antibacterial, which is great for soothing the skin. Rose essential oil is a favourite for many soap makers and is high in vitamins C and E, which are known for their moisturising abilities.
The whipped soap recipe also includes cocoa butter, which is rich in phytochemicals (plant compounds). These are known to boost skin blood flow and protect skin from the signs of ageing caused by harmful UV rays.

How to make whipped soap
We’ve put together two different recipes and methods you can try for making your whipped soap.
Method 1
Ingredients:
- 400g palm oil (solid)
- 200g coconut oil (solid)
- 95g Sodium hydroxide (caustic soda) pearls or beads
- 50g olive oil (pomace, virgin or extra virgin)
- 20ml of essential oils (it can be individual oil or a blend).
Equipment:
- Stainless steel saucepan
- Kitchen scales
- Electric hand whisk
- Heat-proof measuring jug
- Wooden spoon
- Soap mould
- Safety glasses
- Rubber gloves
Method:
- Choose a silicone mould or any other piece of plastic kitchenware for your soap.
- Measure 244g of cold water into a heatproof jug.
- Cover your mouth using a mask to avoid breathing in the sodium hydroxide.
- Add 95g of sodium hydroxide beads (or pearls) to the water and mix well using a spoon or spatula. The solution has now become the lye needed to make your soap.
- This will get extremely hot, so handle with care and leave to cool – it may need to be refrigerated in warm temperatures.
- Add 200g of coconut oil and 400g of palm oil to a saucepan.
- Whisk the oils together (preferably using an electric whisk) until you have a light and creamy consistency.
- Add the lye solution to the whisked oil mixture in a bowl, whilst continuing to whisk.
- You can now add your essential oils (around 20ml) into the bowl, followed by a suitable soap colour and mix it all together.
- Once finished mixing, pour the mixture into your mould.
- As the mix thickens, you can slowly work it a layer at a time to create your desired whip effect.
The mixture can be left to saponify overnight until it is light and solid enough to cut into smaller bars or chunks. You should also leave the soap to cure for 3-4 weeks before it is used.
With regards to the sodium hydroxide, wear gloves, goggles and protection and ensure there is good ventilation. When added in small amounts at low concentration levels it is safe to use, but extreme care must be taken at all times when handling it.

Method 2
Alternatively, you could try this recipe for making your first whipped soap, which uses Polysorbate 80 instead of sodium hydroxide.
You will need the following ingredients:
- 600g Crystal OPC base
- 6g Polysorbate 80
- 12g Soap dyes
- 18g Essential oils
- 6g Carrier oil
Equipment:
- Weighing scales
- Mixing bowl
- Electric hand or stand mixer
- Jugs
- Large piping nozzle and piping bag
- Spatulas
Method:
- Place the crystal OPC base and chop into small pieces before placing into a bowl.
- Whip the base until it produces a creamy consistency.
- Add your preferred carrier oil, essential oils and polysorbate 60 into the mix.
- Whip all of the ingredients together in the bowl.
- Add your chosen soap colourants to the mixture.
- Lay the mixture into the middle of a section of clingfilm.
- Fold up the sides of the clingfilm, tying a knot at the top and mould it into an oval shape, squeezing out any air pockets.
- Roll up the ends and cut off one using scissors before placing it into the piping bag.
- Pipe the mixture into your soap containers to create a beautiful, whipped soap design, enhanced by the use of the piping bag.
Unlike the first method, no curing time is needed, so the soap is ready to use right away in the shower, for shaving, or just to pamper yourself in the bathroom. The second method, using the piping bag, gives you the iconic whipped soap look.

Making a whipped soap recipe is not as complicated as it may look, meaning anyone with a little time on their hands can get creative at home.
Always take care when handling essential oils due to their high concentration levels (carry out a patch test if you are unsure of their suitability for your skin) and use the right safety equipment as advised in the two methods.
But be warned, making whipped cream soaps can quickly become very addictive, because once you’ve made one we’re certain you’ll be back for more!
Buying wholesale essential oils for whipped soaps
When considering what ingredients to use for whipped soaps, it’s important to consider the quality. Whether you plan to make them for personal use or to sell them, our wholesale program offers great discounts with no minimum order quantity.
It’s quick and simple to sign up, and with year-round offers on essential oils and fragrance oils, it’s ideal for those looking to increase their supplies and lower their costs.


