10 min read / 24 February 2025 / yasmin sharp
2. Guide to Wax Melt Supplies, Scents, and Packaging
Learn the basics of wax melt making, including types of wax, fragrance oils, dyes, moulds, and packaging tips.
Share this post

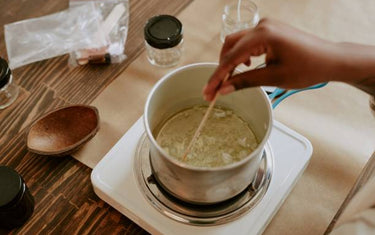
Wax melts are the perfect starting point for anyone who wants to get into the world of wax and candle making.
Before you jump in, it’s a good idea to familiarise yourself with the different types of wax, fragrances, dyes and packaging you can use.
Use our guide to the basics of wax melt making to help you find the right wax melt supplies for your project, whether you are making them for personal use or as part of a product range for your business.

1. Understanding Wax Melt Basics
Benefits of Making Your Own Wax Melts
Let’s start with why making your own wax melts is such a good idea. Some of the main benefits include:
- Creative freedom: The skies the limit when it comes to the shape, colour and fragrances you use in your wax melts, so you can be as basic or creative as you want.
- Affordable hobby: You don’t have to break the bank for a mountain of wax melt supplies, which is great news whether you are making them for yourself or to sell to customers.
- Eco-friendly: Compared to some alternatives, wax melts rank highly when it comes to being eco-friendly, especially if you are using soy wax, beeswax or similar, which do not contain fossil fuels.
- Safe to use: As long as wax melts are kept out of reach of small hands and pets, wax melts are considered very safe to use, as there is no open flame involved.
2. Types of Wax for Wax Melts
So, what are the different types of waxes you can use for your creations? Most tend to be made from:
- Soy Wax: A 100% natural wax that is eco-friendly, vegan friendly and biodegradable, so it ticks all the boxes for green-conscious melt makers. Soy wax has a slow melting point so it can last longer, and it also has a powerful and long-lasting scent throw.
- Paraffin Wax: This is viewed as a more cost-efficient option, which is why paraffin wax is often used in commercial products. As such, you won’t struggle to find places to buy paraffin wax and its strong scent throw is another plus, helping you get more from your fragrance choices.
- Beeswax: Another natural option, beeswax could be the perfect fit for your wax melts. It comes directly from bumblebee honeycombs which gives it a natural sweet aroma, while producing a slow, clean, smoke-free burn with a slightly brighter flame.
Comparing Waxes
| Golden Wax 464 | Golden Wax 494 | Nature Wax C3 | KeraWax 4600 | KeraSoy 4130 | KeraSoy 4120 | |
|---|---|---|---|---|---|---|
| Format | Flakes | Flakes | Flakes | Pastilles | Pastilles | Pastilles |
| Container Candles | Yes | No | Yes | No | Yes | No |
| Pillar Candles | No | Yes | No | Yes | No | Yes |
| Tea Lights | Yes | No | Yes | No | Yes | No |
| Wax Melts | No | Yes | No | Yes | No | Yes |
| Fragrance Load | 8% | up to 10% | 8-10% | 12% | 10-12% | 5-10% |
| Melting Point | 70-75°C | 52-58°C | 51-55°C | 57°C | 42-48°C | 60°C |
| Fragrance Addition Temperature | 60-70°C | 70-75°C | 55-60°C | 82-85°C | Immediately prior to pouring | Immediately prior to pouring |
| Colour Addition Temperature | 80-85°C | 76-82°C | Powder 88°C Liquid, block or chips 68°C |
Powder 80°C Liquid, block or chips 70°C |
Powder 75°C Liquid, block or chips 70°C |
Powder 75°C Liquid, block or chips 70°C |
| Pouring Temperature | 60°C | 65-75°C | 55°C | 55-65°C | 45-55°C | 55-65°C |
| Cure Time | at least 2 days at 18-25°C | at least 2 days at 21-24°C | at least 2 days at 20-25°C | at least 2 days at 18-25°C | at least 2 days at 20-25°C | at least 3 days 18-25°C |

3. Choosing the Right Fragrance: Essential Oils vs. Fragrance Oils
Whether you are using essential oils for wax melts or fragrance oils for your creations, choosing the right one can make all the difference to the finished product.
Fragrance Oils
Fragrance oils are man-made scents that are designed to recreate a naturally occurring aroma. There are two types of fragrance oil:
- Synthetic fragrance oils: These are made purely from chemical components and do not use any elements that are found in nature. This gives them the advantage of retaining their scent for longer than naturally sourced fragrance.
- Natural fragrance oils: Although the name suggests otherwise, natural fragrance oils are still man-made. The difference is that natural derived fragrance components are isolated from a complex scent to create the product.
There’s a huge variety of fragrance oils available, ranging from Ocean Breeze to Forest Fresh Pine scents, so you should never be short on fragrance ideas to use for your melts.
Fragrance oils are well-suited to wax melts due to their scent stability, which ensures a consistent aroma during the melting process. This gives you confidence that the scent will remain reliably strong and consistent throughout its lifespan.
Essential Oils
Essential oils are natural extracts derived from plants, flowers and fruits, which is usually done through cold pressing or steam distillation. People are usually attracted to essential oils because of the:
- Nature based: If you want an authentic smelling scent that comes directly from nature, then essential oils are a great choice. High quality oils should be 100% pure with no other ingredients included.
- Aromatherapy benefits: People use essential oils to calm and ease stress, improve sleep, ease headaches and boost energy levels. There’s no ingestion involved, so it all comes down to their interaction with your senses.
The main limitation with using essential oils for wax melts is the intensity of the scent. Because they are completely organic, this can make the fragrance more volatile and, in some instances, they can evaporate faster than you might expect them to.
Blending Oils
If you are just getting started with using essential or fragrance oils for wax melts, then it might be easier to stick to one scent for your recipes, until you are confident to try something more complex.
When it comes to blending different oils to create unique fragrances for your wax melts, you should consider the following:
- Start with scents that are easy to blend together, such as lavender, vanilla and sandalwood to get an idea of how blending works.
- Use fragrance testing strips or blotter strips to dip into your fragrances. Hold them together in front of your nose and inhale to get an idea of their combination potential.
- Make notes on your scent combination ideas and label your test strips to keep track of what works well and what doesn’t.
- If you are selling wax melts that contain fragrances, there will be legal considerations to factor in, such as Safety Data Sheets and CLP labels, which are used to safeguard your business and customer safety.
Safety Tips
Aside from the legal considerations we mentioned above that are intended to improve safety, you should also bear in mind:
- Both essential oils and fragrance oils are highly potent in their pure form. Always take care when handling, as they can cause skin irritation or allergic reactions, even after they have been diluted with a carrier oil.
- Taking the above into account, it’s a good idea to wear protective gloves, glasses and long-sleeved clothing to protect your skin when you are making your wax melts.
- To create optimal scent throw, it is recommended that you do not use a scent load of more than 10% for your wax melts. So, if you use 100g of wax, 10% of this would be oil, with the remaining 90% being the wax.

4. Dyes and Colourants: Adding Visual Appeal
Once you’ve chosen your wax for wax melts and selected your fragrance, you can start to think about how to make them more visually appealing.
Types of Dyes
- Liquid dyes: Liquid dyes allow for better colour precision, giving you more control over its strength and depth. With a few drops you can create lighter, more subtle shades, while you can make richer, vibrant colours by adding more. They are highly concentrated, so try to avoid spillages and stir well, as liquid dye can cause spots or streaks.
- Mica powders: A natural mineral powder extracted from muscovite. Instead of creating a solid colour, mica powder leaves a shimmer effect, allowing your melts to sparkle and shine. Take care when formulating the recipe, as the powder does not dissolve into the wax, which can sometimes lead to an uneven distribution of colour.
- Natural colourants: Alternatively, you can use natural colourants (which tend to work best with soy wax) to bring your melts to life. For example, alkanet creates a burgundy red shade, madder root turns the wax a nice light peace shade, whilst annatto seeds can form a warm yellow hue on the wax.
Choosing the Right Colour
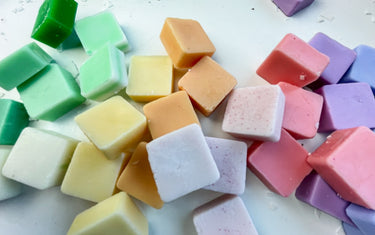
When choosing the colour for your wax melts, remember to take their purpose and theme into consideration. Are they for general use or are they being made for a particular season or to enhance a mood? For example, pastel colours enhance the idea of relaxation, whilst brighter colours suggest something with more energy.
Mixing Colours
You can be as simple or extravagant as you want when it comes to colour mixing but it’s always good to remember the basics. For instance:
- Combining yellow and blue will create green shades (add more yellow to lighten the green).
- Red and yellow = orange
- Red and blue = purple
- Green and red = teal/turquoise
Test and trial your colour ideas before you add them to your main batch, as you want to ensure they mix as you intended.
Colorant Safety
When using colour dyes, always handle with care and follow the guidelines that come with the product. Some can stain skin, cloth and other materials and even cause allergic reactions, so it’s a good idea to wear protective clothing during this part of the process. Protection for your eyes and hands is particularly important, as the dye will need to be added to a particular melting point when the wax will be especially hot.
5. Moulds and Packaging: Shaping and Storing Your Wax Melts
Packaging is an essential part of your wax melt supplies, which includes the moulds used to house the melts and packaging that will help to sell them as products.
Types of Moulds
Silicone moulds
Silicone moulds allow you to use high-quality materials for your melts, which can withstand high temperatures and are extremely hard wearing. Wax does not stick to silicone so the melts can be easily released, and there is an almost endless amount of design shapes to choose from. The higher quality material does mean they cost a little more than other moulds, so factor this into your budget.
Metal moulds
For more basic shapes, you may find metal moulds to be a better option. The material is durable and long-lasting, and they offer a cheaper alternative to silicone moulds. They are also good for dealing with waxes that have a high melting point, due to their ability to withstand high temperatures.
If you are looking for something with a little more creativity, then metal moulds may not be for you due to their relatively basic shape. They are also not suitable with beeswax, as the stickiness of the wax can make it difficult to remove from the mould.
Plastic moulds
If you are just starting out, then plastic moulds could offer a good entry point. They are usually the more cost-effective option, so if you want to take time investing in your equipment, they could be ideal. Plastic moulds can be stored without much fuss and are generally more suited to beginners as they are easy to handle.
Plastic moulds are not always the most durable, so you may need to buy more than you need to account for breakages. They can also sometimes struggle with higher temperatures, so it is worth assessing your melting points before you choose which mould material to use.
Choosing the Right Size and Shape
So, how do you settle on the right size and shape of mould to use for your melts? Take the following into consideration:
- Think about how you intend to package and sell the melts. How many can you get into the packaging you are using? This can help you determine the finished size of each melt before you start.
- How much wax do you have to work with? Factor in the material and production costs involved, as this will also impact your selling price and remaining stock levels.
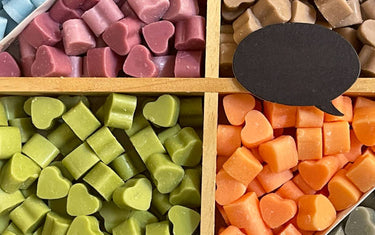
- Are you selling themed wax melts or a cross section of designs? For example, if you want to target the Christmas market, consider the sort of shapes that will catch people’s eye.
- What stage of wax making are you at? If you are a beginner, it may be easier to start with simple shapes and smaller sizes to minimise wastage.
- What kind of moulds are you using? Think of how the wax will interact with the mould material and how easily you will be able to get the melts out of the mould once they have set.
Packaging Options
Sectional boxes
These are boxes that have been divided or sectioned into separate compartments. Not only will it help to give your wax melts more protection, but it creates a pretty layout that instantly captures the eye. You can make your own boxes at home, which can give you more control over the style, colour and size of the presentation, or use a pre-banded box from a supplier.
Clamshells
Clamshells offer a cost-effective packaging option that allows you to use them in two different ways. You can either store a pre-made wax melt inside, so it is revealed once the tabs are unlocked and opened or pour the wax mixture directly into the clamshell packaging. It all comes down to how you want to present your products and how confident you are at pouring and handling the wax.
Cellophane bags
You can use either biodegradable cellophane bags or glassine bags to package your wax melts. It’s an eco-friendly option that is ideal for brands that are big on green issues, as they will naturally biodegrade if they are sent to a landfill or left to compost. If you are keeping a close eye on your budget, then cellophane bags are a good option, whilst also helping to protect the melts against dust and dirt whilst in storage or transit.

Conclusion
Having a better understanding of the different types of waxes, fragrances, dyes and packaging you can use for your wax melts can improve their quality and how much enjoyment you get from them.
Experimentation is the key to success, as it can give you more confidence, and also help to reduce unnecessary wastage. Remember, making wax melts should be fun, so the more you know about the process, the easier it will be, which should also mean less stress and more creativity.
Where you get your wax melt supplies from also counts, whether it’s just for use at home or for your growing business. Sign up for our wholesale service to enjoy exclusive discounts and access to high-quality wax, dyes, oils and moulds that can help you get even more from your creations.


