6 min read / 24 February 2025 / yasmin sharp
3. Wax Melt Techniques, and Creative Tips
Learn the complete wax melt making process, from sourcing ingredients to pouring and setting, with tips, techniques, and troubleshooting for perfect results
Share this post
If you want to know how to make wax melts, then our guide can help you.
Whether you're a beginner or have more experience, this guide will walk you through every step, from sourcing ingredients to cooling and setting your homemade wax melts.
With a few simple techniques, you’ll be able to create beautiful, fragrant wax melts at home. Let’s get started!
Sourcing IngredientsBefore you begin to make your own wax melts, it's essential to gather the right materials. High-quality ingredients are key to creating beautiful and long-lasting wax melts. Key ComponentsWhen selecting wax melt ingredients, consider the following:
|
Supplier Recommendations
The benefits of buying candle wax in bulk include lower costs per unit and the ability to experiment with multiple batches. This can offer you much better value in the long term.
At Nikura, we offer an extensive range of waxes, fragrance oils and essential oils, and dyes for top-quality supplies.
You can also buy in bulk, which you may find to be better value if you’re a business.
Simply sign up for one of our wholesale accounts and get the supplies you need. Our range should make it easy for you to create your own unique wax melt range.
Tips for Ethical and Sustainable Sourcing
When sourcing wax melt ingredients, opt for eco-friendly and cruelty-free products.
Nikura offers a variety of sustainably sourced wax and fragrance oils, helping you create ethical wax melts without compromising quality.
Likewise, you should also try to use minimal packaging or eco-friendly packaging.
This way, you’re being as eco-friendly as possible, which can be a plus to potential customers.

Melting and Mixing Techniques
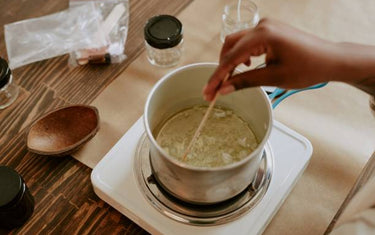
The melting and mixing stage is crucial in learning how to make wax melts. Ensuring the correct temperature and consistency will help with fragrance distribution and the overall quality of your wax melts.
Melting Methods
There are two popular methods to melt wax for homemade wax melts:
- Double Boiler Method: This involves placing a heat-safe bowl over a pot of simmering water. It’s a slow but safe way to melt candle wax evenly.
- Microwave Method: This is a quicker option, but take care not to overheat the wax. Heat in short bursts and stir in between.
If you're wondering what temperature does wax melt, the ideal temperature range varies depending on the wax type.
Soy wax typically melts between 49°C and 82°C, while paraffin wax melts around 50°C to 60°C.
Adding Fragrance and Colour
For perfect homemade wax melts, add fragrance oil or essential oil when the wax reaches the optimal temperature — usually between 60°C and 70°C.
Stir slowly to avoid creating air bubbles. Add colour at the same time, using a small amount to start and adjust as needed.
Tools and Equipment
Here’s a list of essential tools for making your own wax melts:
- Thermometer (for accurate temperature readings)
- Spatula (for stirring)
- Heat-safe mixing bowl
- Double boiler or melting pot
- Measuring scales (for precise wax and fragrance measurements)
- Moulds (silicone, plastic, or metal)
- Pipettes or droppers (for controlled fragrance oil additions)
- Wax melting jug (for clean, easy pouring)
- Mould release spray (optional)
Remember to thoroughly clean your tools after each batch to avoid contamination of fragrance and colour.

Pouring and Moulding
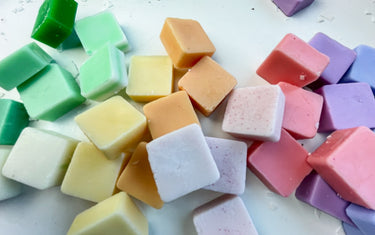
Pouring and moulding your wax melt mixture is where you can get creative. From layering colours to adding decorative touches you can easily personalise your wax melts.
Preparing the Moulds
Ensure your moulds are clean, dry, and free of any debris. Silicone moulds are great for beginners, as they make removing the cooled wax melts easy.
Metal and plastic moulds are also excellent choices but may require more care when demoulding.
Pouring Techniques
The temperature at which you pour your wax affects the final appearance and scent throw.
For soy wax, aim for a pouring temperature of 55°C to 65°C. Pour slowly to prevent air bubbles and ensure a smooth finish.
Creative Tips
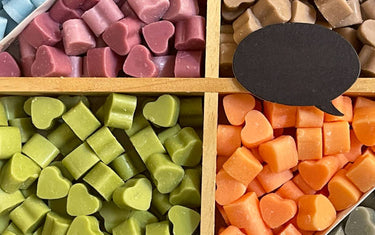
- Layering Colours: Pour a thin layer of coloured wax, let it set slightly, then pour another colour for a layered effect.
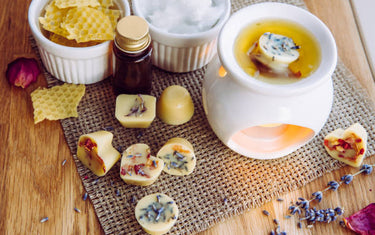
- Adding Decorations: Sprinkle glitter, dried flowers, or mica powder into your mould before pouring the wax for a decorative touch.

Cooling and Setting
Cooling your wax melts slowly and evenly will help you avoid cracks or imperfections.
This section covers everything you need to know to ensure your melts set beautifully.
Cooling Time and Conditions
Allow your wax melts to cool undisturbed in a room with consistent temperature. Cooling times vary depending on wax type and mould size.
Soy wax typically takes 24 hours to fully set, while paraffin may set faster in around 4 to 6 hours.
Demoulding Techniques
Remove them from the moulds once the wax melts are fully cooled and firm to the touch.
If using a rigid mould like metal or plastic, tap the back of the mould to loosen the wax.
Storing Wax Melts
Store your wax melts somewhere dry and cool to keep them in good condition, and seal them in an airtight container.
Good places to store them may include a kitchen cupboard, pantry, or a drawer in a bedroom — anywhere away from heat and moisture.
Avoid direct sunlight, which can cause discolouration. After all, you don’t want to ruin your beautiful new set of wax melts!
Common Troubleshooting Issues
Like with any new skill or hobby, practice makes perfect, and you’ll probably need plenty of it before you perfect your final wax melt range. Here are a few common troubleshooting issues that you should look out for:
- Cracking: If your wax cracks, it’s likely due to rapid cooling. Allow the wax to cool slowly in a stable environment.
- Frosting: This happens with natural waxes like soy. To minimise frosting, pour at a lower temperature and cool in a consistent environment.
- Uneven Scent Distribution: Stir your mixture thoroughly so the fragrance oil spreads evenly throughout the wax.

In Summary
Now that you know how to make your own wax melts, it’s time to get crafting! With the right wax melt ingredients, proper techniques, and a little creativity, you'll be able to create stunning homemade wax melts with unique scents and designs.
Whether you're making wax melts for personal use or as gifts, enjoy the process and feel free to experiment with different fragrances and designs.
If you have any questions about our products and how they can help you make wax melts, feel free to get in touch with us.


