9 min read / 1 October 2024 / yasmin sharp
3. Soap Making Process
Discover the complete soap making process with our step-by-step guide. Learn about preparation, mixing lye and oils, adding additives, moulding, cutting, and curing.
Share this post
Hot Process vs. Cold Process Soap Making
How to Make Soap At Home: Cold Process
What to Do Differently for Hot Process Soap Making
Learning how to make soap at home is an ideal way to ensure you know exactly what ingredients you’re using on your skin.
Whether you’re a hobbyist or small business owner, homemade soap boasts numerous benefits, including customising it with your preferred scents, colours, and additives. Learning how to make natural soap at home means you have full control over the finished product and can personalise your DIY soaps to your liking.
Below, we will walk you through the soap-making process, highlighting everything from preparation and mixing lye solution and oils to moulding, cutting, and curing soap.
Hot Process vs. Cold Process Soap MakingWhen learning how to make soap, you'll come across two primary methods: the hot process and cold process. Each method has its own unique steps, benefits, and characteristics. Cold Process Soap MakingCold process soap making is the traditional method and involves mixing oils with a lye solution at room temperature. The mixture is then blended until it reaches trace and poured into moulds. This method requires a curing period of four to six weeks, which allows the soap to harden and develop its final properties. Benefits of Cold Process:
Considerations:
Hot Process Soap MakingHot process soap making involves cooking the soap mixture, usually in a slow cooker or double boiler, after combining the lye solution and oils. This accelerates the saponification process, and the soap is ready for use as soon as it cools and hardens, typically within 24 hours. Benefits of Hot Process:
Considerations:
Both methods can produce high-quality, homemade soap. Choosing between them depends on your preferences for curing time, design complexity, and overall process control. Whether you opt for hot process or cold process, you’ll still be able to create your own personalised soap products. |

How to Make Soap At Home: Cold Process
Preparation
Calculating Ingredients
Before diving into the soap making process, you will need to calculate the correct amounts of ingredients needed.
The primary components of soap are oils, lye (sodium hydroxide), and water. Each type of oil contributes different properties to the soap, such as lather, hardness, and moisturising qualities.
You should use a soap calculator to ensure an effective recipe, as it will help you determine the precise amounts of lye and water needed. The amounts will depend on the types and quantities of oils you plan to use.
Ingredients Needed
-
Oils: Choose an appropriate oil depending on the properties you want your soap to have.
- Olive Oil: 500g
- Coconut Oil: 250g
-
Water: Typically distilled water is used to ensure purity.
- Water: 300ml
-
Additives (Optional): Essential oils for fragrance, such as our Lavender Essential Oil or fragrant Lemongrass Essential Oil. Use micas or natural colourants for colour, and exfoliants like oats or coffee grounds for texture.
- Lavender Essential Oil: 20ml
- Micas or Natural Colourants: As desired
- Exfoliants: 2 tablespoons
-
Lye (Sodium Hydroxide): Essential for the saponification process.
- Lye: 130g
Make sure you have all the correct tools and safety gear before proceeding to the next step. It’s very important to handle all the ingredients carefully.
1. Mixing Lye Solution and Oils
Lye Solution
Lye for soap making is an essential ingredient as it initiates saponification, the chemical reaction that transforms oils and lye into soap. To mix the lye solution, carefully measure the required amount of lye and water.
Slowly add the lye to the water (never the other way around) while stirring gently.
This mixture will heat up rapidly and produce fumes, so it’s important you do this step in a well-ventilated area and to avoid inhaling the vapours.
Once done, you should let your lye solution cool to the appropriate temperature (typically around 37°C to 43°C) before combining it with the oils.
Oils
Various oils are used in soap making, with each offering different benefits. Common oils include olive, coconut, palm, and shea butter.
Measure out your chosen oils according to your recipe and melt any solid oils gently in a pot.
When it's done melting, let the oils cool to the desired temperature. Combining the oils with the lye solution at the right temperature is essential if you want to achieve a good trace.
2. Trace and Additives
Understanding Trace
Trace is a term that describes the point at which the lye and oils have emulsified and are beginning to thicken.
Recognising trace is important because it helps to show you when the mixture is ready for additives.
Light trace appears as a thin, custard-like consistency, while medium to heavy trace is thicker, resembling pudding.
If you encounter issues such as separation or false trace (where it appears mixed but hasn’t emulsified properly), it’s important to troubleshoot by checking temperatures and mixing thoroughly.
Adding Additives
Additives such as essential oils, colours, and exfoliants can be incorporated at trace.
Essential oils, such as our Ylang Ylang Essential Oil or Lemon Essential Oil provide natural fragrances, while colours can be achieved using micas or natural colourants.
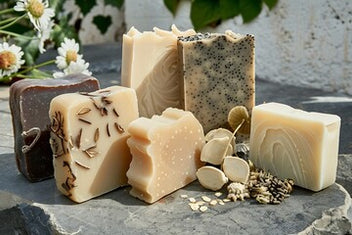
Exfoliants like oats or coffee grounds add texture. Add these ingredients slowly and mix well to ensure even distribution.
3. Moulding and Cutting Bars
Moulding
Once the soap mixture reaches a trace and you have incorporated your additives, you can move onto soap moulding.
Various types of moulds can be used, including silicone, wooden, and custom shapes — it’s all your choice!
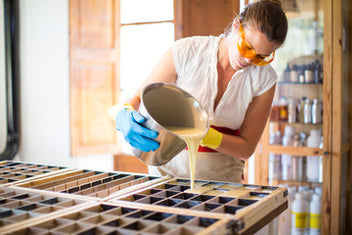
Pour the soap mixture into the moulds and try to avoid air bubbles. You can avoid this by tapping the moulds gently on a surface, which helps to release any trapped air.
Likewise, you should also ensure your moulds are filled evenly for consistent bars.
Cutting Bars
After pouring, allow the soap to harden in the moulds for 24 to 48 hours. Once firm, it’s ready to be unmoulded.
Timing is important; too soon, and the soap may crumble, too late, and it may be too hard to cut smoothly.
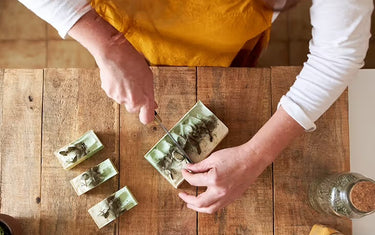
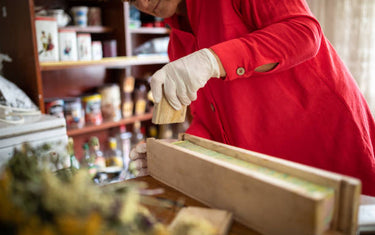
Use a soap cutter or a knife to cut the soap into bars. Aim for uniformity in size and shape for aesthetically pleasing and easy-to-use bars.
4. Curing and Ageing Soap
Curing Process
Curing is an essential part of the soap making process as it allows your soap to harden and any remaining water to evaporate.
It typically takes between four to six weeks. The soap should be placed in a cool, dry area with good air circulation during this time.
Arrange the bars on a drying rack or tray, ensuring they do not touch each other to promote even curing.
Ageing
The ageing process improves the quality of the soap, making it milder and longer-lasting. Curing soap for the full recommended period can boost its hardness and lathering properties.
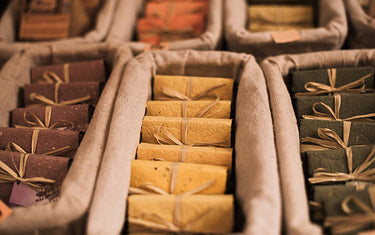
Properly aged soap is also less likely to develop rancidity. Once cured, store the soap in a dry, ventilated area, preferably in paper or cloth wraps, to maintain its condition.

What to Do Differently for Hot Process Soap Making
While the cold process method allows soap to cure at room temperature, the hot process method involves "cooking" the soap mixture. Here’s what you need to do differently:
Cooking the Soap
- Set Up a Slow Cooker or Double Boiler: Unlike the cold process, where you let the soap cure at room temperature, the hot process requires you to cook the soap mixture. You can use a slow cooker or a double boiler for this step.
- Combine and Cook: After mixing the lye solution with the melted oils and reaching trace, pour the mixture into the slow cooker or double boiler. Set it to a low setting.
- Stir and Monitor: Stir the soap mixture occasionally and monitor the temperature. The soap will go through various stages, from thick batter to a more fluid gel-like phase, and finally reaching a consistency similar to mashed potatoes. This cooking process typically takes between 1 to 2 hours.
- Check if it’s Done: The soap is ready when it looks glossy and translucent. You can check using a thermometer for the hot process. It should give a temperature of 71°C; anything below indicates the soap isn't ready. Additionally, you can perform a phenolphthalein test by adding a few drops to a small sample of the soap. If there’s no colour change then your soap is done.
Adding Additives
- Post-Cooking Additives: Once the soap has finished cooking, you can add your preferred additives. Essential oils, micas or natural colourants, and exfoliants can all be incorporated at this stage.
- Mix Thoroughly: Make sure all the additives are evenly distributed throughout your soap mixture.
Moulding and Cutting
- Pouring into Moulds: After adding the additives, pour the hot soap mixture into your prepared moulds. Take care to avoid air bubbles, and delicately tap the moulds to release trapped air.
- Cooling and Cutting: Allow the soap to cool and harden in the moulds, typically for 24 hours. Once firm, unmould and cut the soap into bars using a soap cutter or knife. Unlike cold process soap, hot process soap can be used almost immediately, though allowing it to cure for a week or two will improve its hardness and longevity.
Once you build your skills to a higher level, you could even begin to experiment with making whipped soap, or attempt to make your own soap sponge. As your confidence grows, so should your soap making skills.

Melt and Pour Soap Recipes
For those looking for a simpler way to make soap at home, melt and pour soap recipes offer an easy and quick alternative.
This method instead uses a premade soap base that you simply melt, add your desired additives (like scents and colours), and pour into moulds.
It’s perfect for beginner soap making or if you want to experiment with soap making without dealing with lye. It all depends on what you’re most comfortable with.
In Summary
For beginner soap making, learning how to make soap at home can feel incredibly rewarding.
After reading this comprehensive soap making guide, you should have a much better understanding of how the process works and apply it to your own endeavours.
With a Nikura wholesale account, you can easily cut costs on soap making essentials such as our essential and fragrance oils.
You’ll get access to exclusive discounts and deals — ideal for any soap making enthusiast or business owner. Got a question? Feel free to get in touch with us.

FAQs
What are the common mistakes in beginner soap making?
Common mistakes include not accurately measuring ingredients, not mixing the lye solution and oils at the right temperature, and unmoulding the soap too soon.
You should always double-check your measurements so you know proper safety precautions are followed.
By following these soap making steps and guidelines closely, you can ensure your soap turns out as it should from the beginning.
How can I fix soap that didn't trace properly?
If your soap doesn’t trace, it may be due to incorrect temperatures or insufficient mixing.
Re-mix the soap, ensuring the lye solution and oils are at the correct temperature. If separation occurs, blend until the mixture emulsifies properly.
Can I use fresh herbs and flowers in soap?
Yes, but be cautious. Fresh herbs and flowers can introduce moisture, which might cause moulding.
Dried herbs and flowers are a safer option and can be considered more natural.
Learn more about soap additives in our full guide.
Why is my soap crumbly?
Crumbly soap can result from unmoulding too soon or not using enough liquid in the recipe.
Make sure your homemade soaps have fully hardened before cutting, and follow a reliable recipe with correct measurements.
How do I store my cured soap?
The best place to store your cured soap is in a cool, dry place with good air circulation.
Wrapping the bars in paper or cloth helps maintain their condition. You should avoid putting it in plastic wraps, as they can trap moisture and make your soap soft.


