12 min read / 1 October 2024 / yasmin sharp
8. Advanced Soap Techniques
Explore advanced soap-making techniques: swirling, layering, milk soaps, and sustainable, natural ingredients for beautiful, eco-friendly creations.
Share this post

Section 1: Swirling and Layering Techniques
Section 2: Milk Soaps and Specialty Soaps
Section 3: Sustainable and Natural Ingredients
Once you are set up as a soap maker and have a handle on the basics, it’s a good idea to think about what comes next.
If you want to take your business to the next level, then it may be time to start exploring advanced soap making techniques and new soap making recipes.
Aside from allowing you to be more creative, it can improve the aesthetic appeal of your brand while also enhancing the overall quality of your products.
From learning about what is a cold process soap, to how to swirl soap, to working with specialist and sustainable ingredients, we’ll introduce you to a whole new world of soapmaking in our in-depth guide.
What is a Cold Process Soap?
Cold process soap is a traditional method of soap-making that involves mixing oils and fats with lye (sodium hydroxide) at room temperature, allowing the chemical reaction known as saponification to occur naturally.
Unlike hot process soap, which uses heat to speed up the curing process, cold process soap is made without external heat, preserving the natural properties of the ingredients. This method typically results in a longer curing time, anywhere from 4 to 6 weeks, but the end product is a rich, gentle, and long-lasting bar of soap.

Section 1: Swirling and Layering Techniques
The Art of Swirling and Layering
If you want to get into making specialist products, then applying soap swirling and layering techniques to your process is a great way to get started in the world of advanced soap makers.
When you swirl cold process soap, it creates whirling and eddying patterns that are completely unique to each bar.
The layered soap cold process is also as the name suggests – allowing you to place different blocks of colour on top of each other to stunning effect.
Most homemade soaps tend to be made up of one or two different colours, but you can add depth and vibrancy to your bars by applying swirling or layered designs.
These two simple techniques can instantly transform and upgrade your product line to make your soaps really stand out.
Swirling Techniques
Here are a few soap swirling techniques that are ideal for beginners looking for some fresh soap making ideas:
In-the-pot- swirls
- Separate about one quarter to half the soap into different containers, with one for each colour.
- Add the colourants and mix well.
- Pour the coloured soap batter into the neutral-coloured pot.
- Mix the colours, remembering not to blend them together.
- Pour the soap into the mould.
- Use a skewer or something similar to create soap swirls.
Drop swirls
- Pour a quarter/half of the soap into separate containers, one for each colour.
- Add the colourants and mix well.
- Pour the base colour into the soap mould before pouring the other colours on top.
- This should drop through and swirl into the base to create cold pressed soap decorating.
- The higher the distance of the pour, the stronger the soap swirls will be.
Hanger swirls
- Pour a quarter/half of the soap into separate containers, one for each colour.
- Add the colourants and mix well.
- Pour the soaps in layers into your soap mould. Make sure the layers are thick enough to support the layers being placed on top.
- Place the hanger tool on one side of the mould.
- Slowly move the hanger through each of the layers. This will create soap designs that look like swirls or zig zags. Do not break the top of the soap if you want to keep the top one even colour.
- Remove the hanger from the side of the mould when you have finished.
Zebra/Tiger Stripe
- Pour alternating layers of contrasting coloured soap batter into the centre of the mould, allowing each layer to push the previous one outwards, forming stripy patterns.
- Continue adding thin layers until you achieve the desired stripe effect.
- Tap the mould gently to ensure the soap is level and to help any air bubbles escape.
Adding Decorations
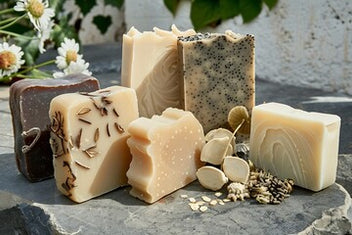
- Sprinkle dried botanicals, cosmetic-grade glitters or seed additives on top of your soap before it sets, creating an additional visual layer.
- Gently press larger decorations (such as small soap embeds or decorative stones) into the top layer for added dimension and appeal.
Layering Techniques
If you want to add extra depth and dimension to your soap, then you may want to experiment with some layering techniques.
Layering is the stacking of different colours on top of each other, which can designed in multiple ways, whether it’s in straight lines, with pointy layers or even in a slanted style.
For instance, you could use different coloured hues to create a gradient effect throughout the bar of soap. Or you can combine different soap designs into a single batch to create a unique layered design for your product.
Choosing complementary colours and fragrances
The easiest way to match colours and fragrances in your homemade soap bars is to think of how the colour inspires the fragrance or vice versa.
For example, if you are planning to make a blue or purple soap bar, adding a lavender fragrance creates a theme based on the origins of the oil. Similarly, if you are layering the soap or using swirl techniques, think of how the fragrances can complement the colours, whether it’s based on individual shades or how the colours bleed together.
The goal is to create an all-round experience, with the colours and fragrances working together to engage the senses. Whilst a bar of soap has a functional purpose, it can also be a very personal product that can capture the imagination when the right ingredients are used.
Tips & Tricks Sidebar
Layering and swirling tips
- Use plenty of “slow-moving oils” (oils that are liquid at room temperature) to create thin or medium trace soap batter.
- The average soaping temperature is around 110-130° F, although soaping at slightly cooler temperatures gives you more control when aiming for a thicker trace.
- Avoid fragrances that accelerate trace, as this will thicken the batter as soon as it is mixed in.
- Use mica powders for colouring layered soaps, which helps to avoid colour bleeding.
- Keep experimenting and trying new ideas – every mistake means you are one step closer to success!
Common mistakes to avoid
- If the soap batter thickens too quickly to layer or swirl the soap, alternate between hand-stirring and short bursts of the stick blender so it doesn’t thicken too quickly.
- Add a light layer of rubbing alcohol before pouring each later to glue them together if they keep separating.
- When layering soap, keep a close eye on timings and temperatures as these are key to making successful designs.
- Do not refrigerate layered soap as the low temperatures could separate the layers. Set aside the mould out of harm’s way to let it cool and set.

Section 2: Milk Soaps and Specialty Soaps
Crafting Milk Soaps and Specialty Bars
The natural properties contained within various types of milk make it the perfect replacement for water in soap recipes.
For example, milk contains calcium that helps to keep skin hydrated and lactic acid which can act as a natural exfoliant. It also has natural properties like selenium which can strengthen cell membranes and vitamins A, D and B6 that help to smooth out fine lines.
This gives you much more scope to be creative with your soap recipes so you can make speciality bars targeted towards specific customer types. Whether it’s certain age groups, customers looking for vegan-based products or soaps for specific skin types or conditions, milk soaps broaden your range and make your brand more accessible to a wider audience, just follow our step bt step soap making recipes!
Milk Soaps
- Goats milk: Adding goat’s milk to your soap recipe can boost the moisturising properties of your bar. Regular use of goat’s milk soaps can help to soften skin and reduce the signs of ageing.
- Oat milk: Oat milk is a good vegan option for natural brands and for increasing the exfoliation benefits of your soap. It can lock in moisture and prevent water loss thanks to the presence of beta-glucan.
- Almond milk: Another vegan-friendly option, almond milk creates a creamy lather that enhances lathering. The milk is rich in fatty acids helping to nourish and moisturise skin to prevent it from drying out.
- Coconut milk: Coconut milk is known for its lathering effects, with its saturated fats creating a creamy, dense foam when in use. It’s soft and gentle on skin, whilst also helping to cleanse without removing natural oils.
- Cow milk: You can use cow milk for soaps that want to target eczema, acne, rosacea and similar skin conditions. People with dry skin, eczema, psoriasis, acne and similar conditions may also benefit from using this type of soap bar.
Step-by-step guide to making milk soap
Ingredients:
- 425g olive oil
- 370g unrefined shea butter
- 375g goat milk (or other milk) frozen
- 340g coconut oil
- 155g sodium hydroxide (lye)
- 29g essential oils, optional
Method:
- Freeze the milk the night before in the bowl you will be using to make the soap.
- Melt the coconut oil and shea butter (you can use a microwave if it’s easier).
- Add the lye to the frozen milk and stir carefully and leave to cool for 10 minutes once finished.
- Pour the coconut oil into a separate bowl and add the olive oil.
- Slowly pour in the lye and milk mixture and stir until fully blended.
- Add any essential oils you are using for the recipe to the mixture and stir in.
- Carefully pour the mixture into your soap moulds.
- Leave the mixture to dry and set in the moulds for at least 24 hours.
- Remove the soap from the moulds and leave in a cool, dark space for 3-4 weeks to cure.
Troubleshooting common issues with milk soaps
- Lye solution changing to unexpected colour: Add alternative liquids such as milk may unexpectedly change the colour of the lye. However, the colour of the lye does not always determine the final colour of the soap, especially if you are adding your own colouring agents.
- Over expanding in soap moulds: Milk contains natural sugars and if the soap becomes too overheated it could start to expand outside of the moulds. Lyes and oils should be allowed to cool under 120° F (49°C) before you start to use them, and even lower than using milk and other liquids that contain sugars.
- Uneven, wrinkled appearance on the surface: Again, this is likely due to overheating. Before mixing the lye mixture with the other ingredients, check that it has cooled to below 120° F (49°C).
- Darker centre and lighter edges: If the centre of the soap reaches a high temperature but the outside of the bar doesn’t, this can cause something called partial gel. To maintain a lighter colour throughout, use individual moulds and place them in the fridge for 24 hours after pouring.

Specialty Soaps
You may want to extend your product range by venturing into the world of speciality soaps, which are formulated for different skin types and needs.
Including additives in your ingredients can also add colour, decoration, scent and texture to your products. They can be made to match the skin’s pH, helping to avoid alkaline skin damage whilst still effectively removing dirt build up.
For example, using essential oils in soap making that are kind to skin can reduce irritation and provide natural plant-based properties. For example, lavender and frankincense are both gentle on skin, whilst eucalyptus can add moisture to soothe painful, itchy skin rashes.
Here are some suggestions of natural additives you could use in your recipes:
- Salt: To harden the soap, dissolve the soap in water and mix with the batter. Use around 10g of salt per kg of oils.
- Sugar: Adding sugar will boost the lathering qualities of your soap. Similarly, dissolve in water before adding to the batter, using the same weight ratio as salt.
- Activated charcoal powder: This helps to absorb excess dirt, oils and toxins. Add one teaspoon with one tablespoon of a lightweight oil at the time of trace.
- Bentonite clay: Include bentonite clay to enhance lather and boost detoxification properties. Aim for around 1 teaspoon of clay per 500g of soap.
- Calendula petals: To nourish and rejuvenate skin, add 25g to 500g olive oil as it melts and leave to infuse in a jar for a few weeks.

Section 3: Sustainable and Natural Ingredients
Embracing Sustainability and Natural Ingredients
The demand for natural soap continues to grow as customers gain a better understanding of the ingredients used to make their products. Consumers are realising that switching to natural alternatives is not only beneficial for the planet but also for their skin and general health.
Being eco-friendly is not just a passing trend, but a mood shift that is changing the way people perceive and interact with brands. So, it makes sense to think about how you can incorporate sustainable practices and natural ingredients into your recipes.
Sustainable Practices
Choosing sustainable and environmentally friendly ingredients for your soaps is becoming increasingly important. Customers concerned about the health of our planet look for brands that use organic and ethically sourced ingredients for their soaps.
Using biodegradable natural soap ingredients in your recipes, such as essential oils, plant-based oil and botanical extracts, is a win-win for both you and the customer. Being part of the green economy helps you find a niche that helps the planet, whilst customers have a reliable source for getting the products they need.
Tips on reducing waste and reusing materials in soap making
It’s not just the type of ingredients that are added to your soap recipes that will have an impact, but how you use them.
Recycling and reusing waste and materials is good for the environment and can save you a considerable amount of money in the long run. Here are some tips to consider:
- Source natural soap ingredients: The likes of olive, coconut, and palm oil are all plant-based oils and perfect for sustainable soap making. Using essential oils in soap making also ensures some ingredients are sourced from natural sources.
- Lower your water usage: If you are adding water to your recipe, only use what you need to minimise wastage. And if you do have a lot left over, put it into storage for use in the next batch.
- Improve energy efficiency: Reduce energy consumption by turning off appliances when not in use and switching to LED lighting in the kitchen. When using any appliances (such as the microwave) switch to the energy-efficient settings.
- Reduce wastage: Instead of throwing away what you don’t use in your current batch, think of how materials and ingredients can be recycled and reused. For example, try to repurpose soap scraps, wash and reuse moulds and think about how you use leftovers and byproducts to boost your creative output.

Eco-friendly packaging
If you are using natural soap ingredients, it makes sense to create a cohesive brand centred on sustainability, which also includes the packaging.
Some ideas worth considering include:
- Cardboard box packaging: Consider using cardboard made from 100% biodegradable materials, which will not only protect your products when they are shipped but also ensure minimise the packaging’s impact on the environment.
- Bamboo packaging: Bamboo packaging is made from the plant’s pulp, powder and fibres, making it an eco-friendly and renewable option. Using this type of packaging can really help your products to stand out and demonstrate your commitment to the environment.
- Paper-based packaging: This gives off a more natural style that perfectly complements soap products. Using paper-based packaging is eco-friendly and cost-effective and versatile enough to allow you to get creative with your branding designs and techniques.
- Moulded pulp: Also known as moulded filter packaging, this is created using fibrous materials such as bamboo, recycled paper, cardboard, wheat straw and sugarcane. The packaging is robust and three-dimensional enough to offer a variety of shapes and sizes and it also features round-edging which gives it a distinctive design.
Natural Ingredients
Some of the more common natural ingredients used in soap making include:
- Shea butter: Contains moisturising and nourishing properties that can hydrate dry skin and treat scars and wrinkles.
- Coconut oil: Another natural moisturising ingredient that forms a protective layer to cleanse, condition and protect skin.
- Vitamin E oil: Add vitamin E to boost antioxidant properties and enhance skin health whilst also supporting the stability of other ingredients.
- Essential oils: Using essential oils in soap making, such as lavender oil which is calming and relaxing, or lemon oil which treats oily skin, provides natural properties and distinctive fragrance notes.
- Additives: As we discussed in more detail above, including natural herbs and botanicals can transform the appearance of the soap and add a host of health benefits.

Conclusion
Moving onto advanced soap techniques is a natural progression for most soapers, allowing you to learn new skills and broaden your product range.
From adding swirling and layering techniques to your repertoire to making speciality soaps and using natural ingredients, feel free to be as creative and experimental as you want.
Also consider the sustainable aspect of your products, as being eco-friendly can be as beneficial to the planet as it can be for your business, opening you up to an ever-growing market of green-conscious customers.
And if you like the idea of using essential oils in soap making (or fragrance oils for that matter) find out how our wholesale service can offer discounts that reduce production costs and improve your profit margin.


