7 min read / 1 October 2023 / yasmin sharp
How to Make Bath Bombs at Home
Learn the secrets to crafting perfect bath bombs.
Share this post
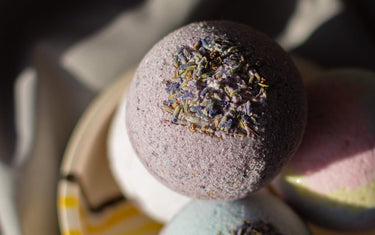
Relaxing in a nice, warm, bathtub can sometimes be the pinnacle of the day, especially if you are mentally or physically fatigued.
But if you are looking for something more than a bubble bath, you could make your own bath bomb that will add an exciting splash of colour and fragrance to the experience.
Bath bombs are quick and easy to make and can also be fantastic self-care gifts for friends and family. Here we explain how to make a bath bomb, the benefits it can offer and lots more.
What is a bath bomb?A bath bomb can be a wonderful addition to a warm, relaxing bath, bringing together a combination of ingredients that include essential oils, food colouring and citric acid. Once dropped into the water, it turns an ordinary bath into a fun, relaxing haven. |

What are the benefits of bath bombs?
There are lots of ways bath bombs can help your mind and body. Some of the main benefits they can offer include:
1. Bath bombs can be great for your skin
Depending on the essential oils you include in the recipe, bath bombs can help to improve the condition of your skin. For example, lemongrass oil can help oily and acne-prone skin, whilst lavender oil is good for dry skin.
2. They allow you to enjoy some “me” time
Stepping into a nice, warm, relaxing bath at the end of the day can help to soothe your muscles and ease bodily aches and soreness. You could try some floral essential oils, like lavender oil or clary sage oil, that can allow you to unwind and enjoy some “me” time.
3. Manage anxious or stressful thoughts
Certain fragrances can influence your moods, so you can add your favourite essential oil to the recipe or try a new combination that will ease anxious or stressful thoughts.
4. Lower blood pressure levels
When soaking in bath bomb infused water, your veins expand temporarily due to the increased temperature. With your blood flowing more freely around your body, this can help to reduce your blood pressure and improve circulation.
5. Enjoy a better night’s sleep
Lavender essential oil is the go-to option for many people before they go to sleep, with the fragrance creating a comforting and relaxing ambience. Add the oil to your bath bomb and enjoy a soothing bath a couple of hours before you head off to bed.

How to make bath bombs
To make your own bath bombs you can follow the recipe below. Here’s a checklist of things you will need:
- 1 cup baking soda
- ½ cup citric acid (you can replace this with the same amount of lemon juice, buttermilk powder, cream of tartar or ½ cup each of apple cider vinegar and baking powder).
- ½ cup Epsom salt
- ½ cup cornstarch
- ¾ tablespoon water
- 2 tablespoons of your preferred essential oil (lemongrass, lavender, orange or rose, for example)
- 2 tablespoons of carrier oil (coconut, jojoba, sweet almond etc.)
- 2-3 drops of food colouring
- Bath bomb mould (you buy round moulds online or use small tins/pans)
- Add dried flowers or orange peels for decoration (optional)
Bath bomb recipe instructions
Step 1
Add all the dry ingredients into a large mixing bowl, leaving aside the citric acid.
Step 2
Pour all the liquid ingredients into a jar that has a lid. Place the lid onto the jar and give it a good shake.
Step 3
After shaking, undo the lid and pour the liquid ingredients into the large mixing bowl with the dry ingredients. Mix everything together using your hands. You can now add the citric acid to the mixture. Once added, the citric acid will fizz a little, but this is a normal reaction.
Step 4
At this point, the mixture should look broken and crumbly. Don’t worry, as this is how it should look and there is no need to add any water, as this could ruin the recipe.
Step 5
Start placing the mixture into your moulds, ensuring it is packed tightly using a glass or spoon. It’s a good idea to slightly overfill the moulds, as this will help the bath bomb to hold itself together. Immediately loosen the mixture from the moulds onto wax paper and leave them to dry overnight.
Step 6
Leave the bath bomb mixture to dry for 1-2 days before you use them.
Step 7
The bath bombs are now ready to use, so feel free to give it a try by popping one into a warm bath. You’ll see a wonderful burst of colours as it dissolves in the water and the essential oils will be released to create a lovely, calming fragrance.

Bath bomb ingredients for sensitive skin
Citric acid is the main ingredient typically used in bath bombs, although if you have sensitive skin, you may want to use something else.
As we mentioned in the ingredients list above, you can replace citric acid with lemon juice, buttermilk powder, cream of tartar or by mixing apple cider vinegar and baking powder.
If you are worried about the food colouring causing a reaction, you can either remove it from the recipe or replace it with a natural option.
Fragrances can also sometimes cause reactions on the skin, so you may want to remove these. Alternatively, you can complete a patch test a day or two before you start the recipe to check its compatibility with your skin.
All you need to do is mix a small amount of your chosen essential oil with a carrier oil and add 2-3 drops to the inside of your elbow. Cover with a plaster for 24 hours and if you see any redness, inflammation, or any other kind of reaction, wash the oil off with warm water and either try another oil, or do not add any to the recipe.
Where can I buy citric acid?
You can buy citric acid online from a wide variety of suppliers or if you prefer to shop in person, you should be able to find it at a large pharmacy.
Citric acid may sound like a very powerful and slightly scary ingredient, but it is perfectly safe to use as it is neutralised by baking soda. It is also the main ingredient used in nearly all commercial bath bombs.
Tips for making homemade bath bombs
To make your own bath bomb, you can use our step-by-step instructions above. The following tips will also help you along the way:
- If you are using food colouring, liquid products perform better than gels. This is because gels stick together, which makes it harder to mix in when you add the citric acid.
- When the liquid ingredients have been added to the bowl, start mixing everything together as quickly as possible before placing it into the moulds.
- The mould mixture should be placed onto wax paper (so they do not stick) in a cool, dry place away from heat and water sources. They may take longer to set in humid weather.
- You can also make a rainbow bath bomb that includes multiple colours, which will look amazing when it is dropped into the bath.
What can I use as a bath bomb mould?
There are no real limitations on what you can use as a bath bomb mould. To give you some inspiration, you could try some of the following:
- Silicone ice cube trays
- Christmas tree decorations
- Yoghurt or pudding pots
- Plastic biscuit cutters
- Easter Egg plastic packaging
If you are making bath bombs with your children, it’s a good idea for them to make half shapes as making a full sphere that sticks together can be difficult.
To make a full sphere, you’ll have to use two-sided moulds. Once you have slightly overfilled each side, stick them together using elastic bands until the mixture is fully dried.

Do bath bombs expire?
Bath bombs will eventually expire, so to get the most of your creations, it’s a good idea to use them as soon as possible.
If they are stored correctly in dry, cool space, they should retain their potency for up to 6 months, although the longer you leave it, the less effective they will be.
What are the side effects of using bath bombs?
Bath bombs are generally considered safe to use, as long as you do not have any existing skin conditions. If you do, please read through the sensitive skin section above for guidance on how to adjust the recipe.
The citric acid and baking soda will neutralise each other once they hit the water, so you do not have to worry about using these ingredients.
Avoid using bath bombs in baths for babies and children younger than 7 years old, as there is a possibility the ingredients could cause an unwanted infection in their developing urinary tracts.

Once you have gathered together all your ingredients, it doesn’t take long to make your own bath bomb. 1-2 days drying time is needed, but once they’re ready, you can pop them into your next bath and enjoy the explosion of colour and fragrance. You shouldn’t have much trouble finding citric acid, and if you have sensitive skin there are lots of alternatives you can use instead, which applies to all the ingredients. Try to use your bath bombs within 6 months of creation and do not use them in baths for babies and children under 7.


