5 min read / 30 May 2023 / Laura Garvin Gomez
DIY Candle Holders You Can Try at Home
Do you have lots of candles lying around that you don't know what to do with? Are you an aspiring candle maker who needs more inspiration? We're listing our favourite DIY candle holder ideas just for you.
Share this post

Sometimes, the difference between an amazing, centrepiece-worthy candle and a sad lump of wax in a drawer is the very vessel we choose to hold the candle in.
Candle holders come in a range of shapes and sizes, but many of them can appear very similar and uninspiring in their design. For instance, it's not totally uncommon to see rows and rows of candles sitting in plain glass jars with no real unique spark to them.
For those that opt for hints of maximalism around their homes, finding new candle holder ideas is the perfect way to create interest while also keeping your spaces smelling beautiful.
With that in mind, here are some of our favourite recipes on how to make candle holders using simple, everyday objects from the comfort of your own home.
DIY Candle Holders
Depending on what you have in mind and your skill level, some of these homemade candle holders may require more prep than others. But that's okay! Feel free to choose the options that best suit you and the vibes you like to emulate around your home.
Add glitter to a jar candle
Remember those boring rows of candles in glass jars? This is the perfect way to easily (and cheaply) add some flair to a simple design. Here's how to make them:
- Paint the bottom half of your candle jar with gold paint or glue using a foam brush. You can also use a paintbrush or an old toothbrush if you prefer.
- If you want more accuracy, feel free to add masking tape to your jar before painting. If not, free hand it to create a rustic look.
- Dust your jar liberally with glitter in the colour(s) of your choice. Shake off the excess and brush away and fly-away pieces with a fine brush.
- Leave the glitter to dry. If you've used masking tape, wait until after the glitter has dried to remove it.
- Your candle maker is ready to use!

Make your own candle inside a teacup
Vintage teacups are beautiful all on their own, but sometimes they can take up space to the point where they become impractical. If you have some spare teacups lying around, why not repurpose them into some gorgeous candle holders?
If you're a candle maker, all you need to do is make a candle as normal using a teacup as your container. If you've never made candles before, you can check out our beginner's guide to candle making for more details on how to get started.
Here are some basic steps you'll need to follow:
- Thoroughly clean your teacups and leave them to dry.
- Carefully place your wick into the centre of the cup. Secure it using a wick holder or chopsticks/pencils.
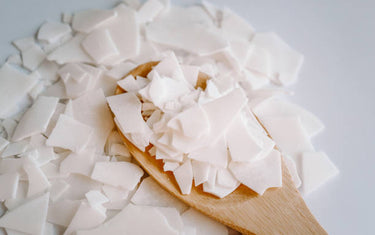
- Place approximately two handfuls of wax chips into a glass jug.
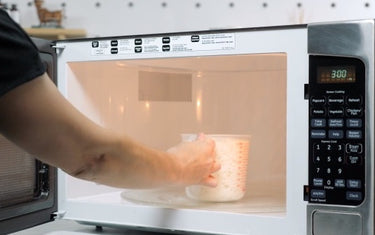
- Using the microwave method, heat the wax until fully melted. You can also use the double boiler method if you prefer. Learn more about methods for melting wax.
- Once cooled to the right temperature, add your essential oils or fragrance oils.
- Pour the melted wax carefully into the teacup until it almost reaches the top.
- Leave to cool for one hour, then make a series of small holes around the wick to let any excess air out.
- Melt some more wax to top up your candle. Leave it to set for 24 hours.

Paint your candle holders with unique patterns
Once again, this is a great option for jazzing up any plain glass candle jars that you have lying around. The great thing about transparent glass paint is that you can use it in numerous different ways to create unique vibes for your candle each time.
Here's how to make them:
- Firstly, if you're working with empty candle holders, it might be a good idea to paint the inside of the jar as well. Pour your glass paint into the jar and start slowly turning it on its sides. This will allow the paint to spread along the inside.
- Turn the jar upside down and place it onto a plate. This helps the paint drip downwards across the glass walls of the jar.
- Let it sit for about an hour, moving the jar every 15-20 minutes to avoid it sticking.
- If you're skipping this step, all you have to do is paint the outside of your jar as desired. Leave to dry for an hour and then add any patterns you'd like to the side of the jar.

Make candle holders using air-drying modelling clay
Modelling clay is becoming increasingly popular in the crafting world for its versatility. It works great for adding an interesting twist to candlesticks that would otherwise be sitting in a drawer, so why waste them?
Creating candle holders with modelling clay also allows you to craft different patterns each time, meaning they make fantastic gifts for loved ones if you're seeking a homemade twist for an everyday item.
Here's one way to craft them:
- Purchase some air-drying modelling clay. This can be found at most crafting stores.
- Knead the modelling clay to help loosen it before you start shaping. It's also a good idea to have a pot of water handy for smoothing down lumps of clay and sticking them together.
- Using a rolling pin, roll out a piece of clay until it's at an even width. Shape it as desired into a circle, or leave it as is for an abstract look.
- Roll out a separate strip of clay that's no thinner than 1/2 cm in thickness. Ideally, the strip should be around 3-4 cm wide.
- Wrap the strip around your candlestick to determine how long it should be. Note: Air dry clay shrinks when it dries, so make sure you're leaving a little bit of breathing room!
- Score the adjoining edges of your strip and stick them together with water or slip. Slip is made by mixing small lumps of clay with water, and acts as a sort of glue.
- Score the base of your strip (which should now look like a tube) and attach it to the base using water or slip. Once you're happy with the shape, decorate the candle holder as desired with different patterns.
- Allow to dry for 24-48 hours. Once dried, use sandpaper to smooth down any rough edges. You're done!

Crafting candle holders is not only incredibly simple but also highly cost-effective. In time, you'll want to add your own twist to every candle you come across, and you should!
Whenever you're working on DIY candle holders for your home, make sure you're following the proper steps and remember to always work safely if you're using heat.


