4 min read / 6 December 2021 / Caitlin Devlin
How to make candy cane soap for Christmas
In need of extra gifts? Try making these beautifully-scented bars at home.
Share this post
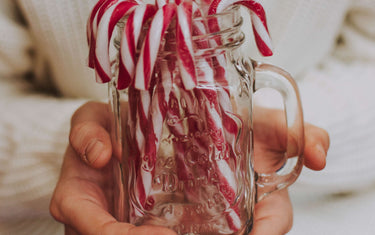
Capture a Christmas favourite in this sweet, festive soap recipe.
We won’t blame you if you’re reluctant to brave the cold and the high street chaos this year. There’s plenty of great ways to tick off that Christmas shopping list – without going shopping at all.
If you’re stuck for extra gifts for friends and family, or you just want to get festive with some Christmas-themed crafts, then try making this joyful Christmas candy cane soap.

Before you start:
This recipe uses a swirl technique that will require three jugs to achieve. However, don’t be daunted by the word ‘technique’ – it’s simple enough to try even if you’re a beginner, and as with all these things, practice makes perfect.
This recipe won’t include a list of equipment and the instructions may not be minutely detailed at every stage.
That’s because you can find all of this information by heading over to this article: A beginner’s guide to making soap using essential oils.
We recommend having it open as you work through this recipe, especially if you are fairly new to soap-making.
You should also pay attention to all the relevant safety information contained in the article.
Ingredients:
- 63g sodium hydroxide
- 110g distilled water
- 114g coconut oil (refined)
- 91g shea butter
- 227g olive oil
- 23g castor oil
- 5 tsp Spearmint Essential Oil/5tsp Candy Cane Fragrance Oil
- 2tsp olive oil (for mixing)
- Red soap dye or pigment
- Green soap dye or pigment
Which oil should I use?
If you want to use natural scents in your soap, then spearmint essential oil is the way to go. Its sugary, minty sweetness is ideal for a candy cane-inspired creation.
You may also want to use peppermint essential oil if that is more to your taste.
If you want a stronger, bolder scent, then try substituting in our Candy Cane Fragrance Oil. You could also try using other fragrance oils, if you wish.
Your soap will smell delicious either way.
How much soap dye should I use?
This depends a lot on what kind of colourants you are using, and so its impossible for us to give specific measurements here.
Make sure that you closely follow any instructions from the supplier or manufacturer when you are preparing your colour.

Method:
- Measure your coconut oil and shea butter into a pan, and your olive oil and castor oil into a jug.
- Pour the distilled water into a heat-proof jug.
- Prepare your red dye, then mix into a jug with one teaspoon of olive oil.
- Prepare your green dye, then mix into a jug with one teaspoon of olive oil.
- Dissolve the sodium hydroxide crystals into the jug of water. *Please refer to our soap-making guide for instructions on how to do this safely. *
- Melt the coconut oil and shea butter in a pan on a very low heat. When both have melted, remove the pan from the heat and set down on a heat-proof surface.
- Pour the olive and castor oil into a pan with the melted coconut oil and shea butter.
- Measure the temperature of the mixed oils and lye solution – both should be around 35-38 degrees Celsius.
- Pour the lye water through a sieve into the pan of oils.
- Stir the solution together. Then hold the stick blender to the bottom of the pan and blitz for a couple of seconds. Turn off, stir, and repeat until the mixture thickens to ‘trace’. At this stage it should have a thin, custard-like consistency.
- Add the spearmint essential oil and fully mix in using a spatula.
- Pour a quarter of the soap batter into the red dye and stir until fully mixed in. Pour another quarter of the soap batter into the green dye and stir until fully mixed in. Pour the rest of the soap batter into a third jug.
- Pour two fifths of the red mixture into the jug right by the spout, at the ‘front’ of the jug. Then pour another two fifths of the red mixture into the jug in a spot directly opposite, at the ‘back’ of the jug. Make sure to pour from up high so that the colour is forced right to the bottom of the jug. You should have about a fifth of the red mixture left.
- Pour two fifths of the green mixture in at the left-hand side of the jug, exactly halfway between the two red spots. Then pour another two fifths in at the right-hand side, directly opposite. Make sure to pour from up high so that the colour is forced right to the bottom of the jug. You should have about a fifth of the green mixture left.
- You should now have four points of colour at 90-degree angles to each other on the surface of the mixture, with the two red points opposite each other and the two green points opposite each other. Insert a spatula into the mixture and press to the bottom of the jug. Make one clockwise turn before pulling it out carefully.
- Pour the mixture into your mould and tap to settle it.
- Drizzle the remaining red and green mixture over the top of the mould and tap again to settle it.
- Inserting a skewer just under the surface of the mixture, draw vertical lines from one side of the mould to another. You could also use a toothpick or a chopstick here.
- Leave the soap in its mould for 48 hours before cutting into bars. You should then leave the soap to cure in a cool, dry place for 28 days.
- Package up as Christmas gifts and give away – or keep for yourself.


